acme.sh申请SSL证书
更新时间: 3/26/2025
简介
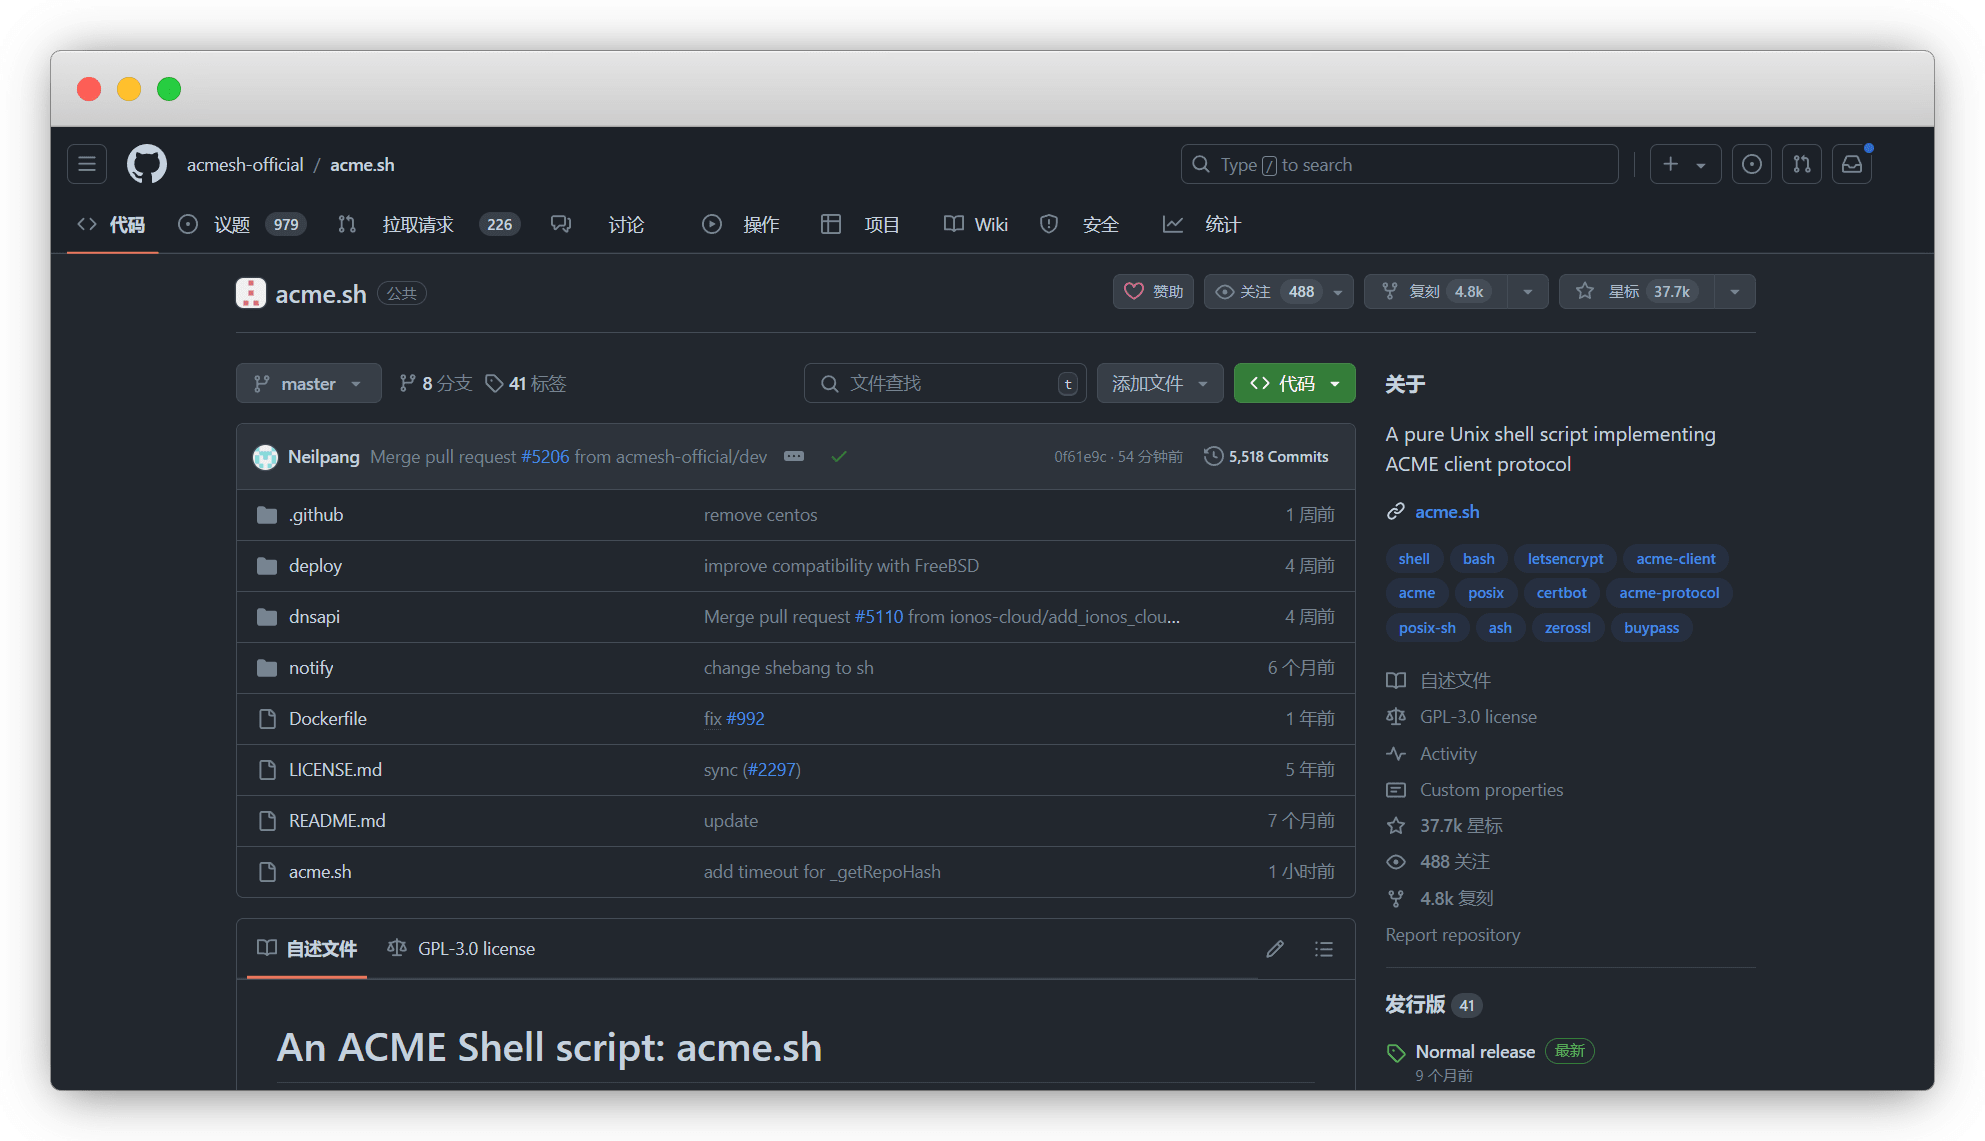
acme.sh 是一个由 @neilpangxa 使用Bash编写的脚本,集成了 acme 协议的SSL证书申请工具
项目:https://github.com/acmesh-official/acme.sh
wiki:https://github.com/acmesh-official/acme.sh/wiki/
免费方案
证书数量:无限制
有效期:90天
通配符/泛解析:支持
验证方式:HTTP文件验证、DNS验证、tls alpn独立验证、Apache服务验证、Nginx服务验证、无状态模式验证
自动续签:支持
什么是 通配符 和 泛解析
通配符
*:是泛解析的一个必用字符,用来表示当前级通配符证书:可以多个二级域名或三级域名共用一个证书,只需要申请一张即可
| 域名/示例 | 泛解析 | 包含 | 不包含 |
|---|---|---|---|
| 一级域名 | ❌ | baidu.com | - |
| 二级域名 | *.baidu.com | baike.baidu.com www.baidu.com ... | baidu.com |
| 三级域名 | *.bce.baidu.com | login.bce.baidu.com h5.bce.baidu.com ... | *.baidu.com bce.baidu.com |
| 依次类推 | ... | ... | ... |
安装
本次用
CentOS 7演示,其他系统可以参照开始前,请用SSH工具连接服务器
打开 wiki,搜索 Install,点击 Install-preparations
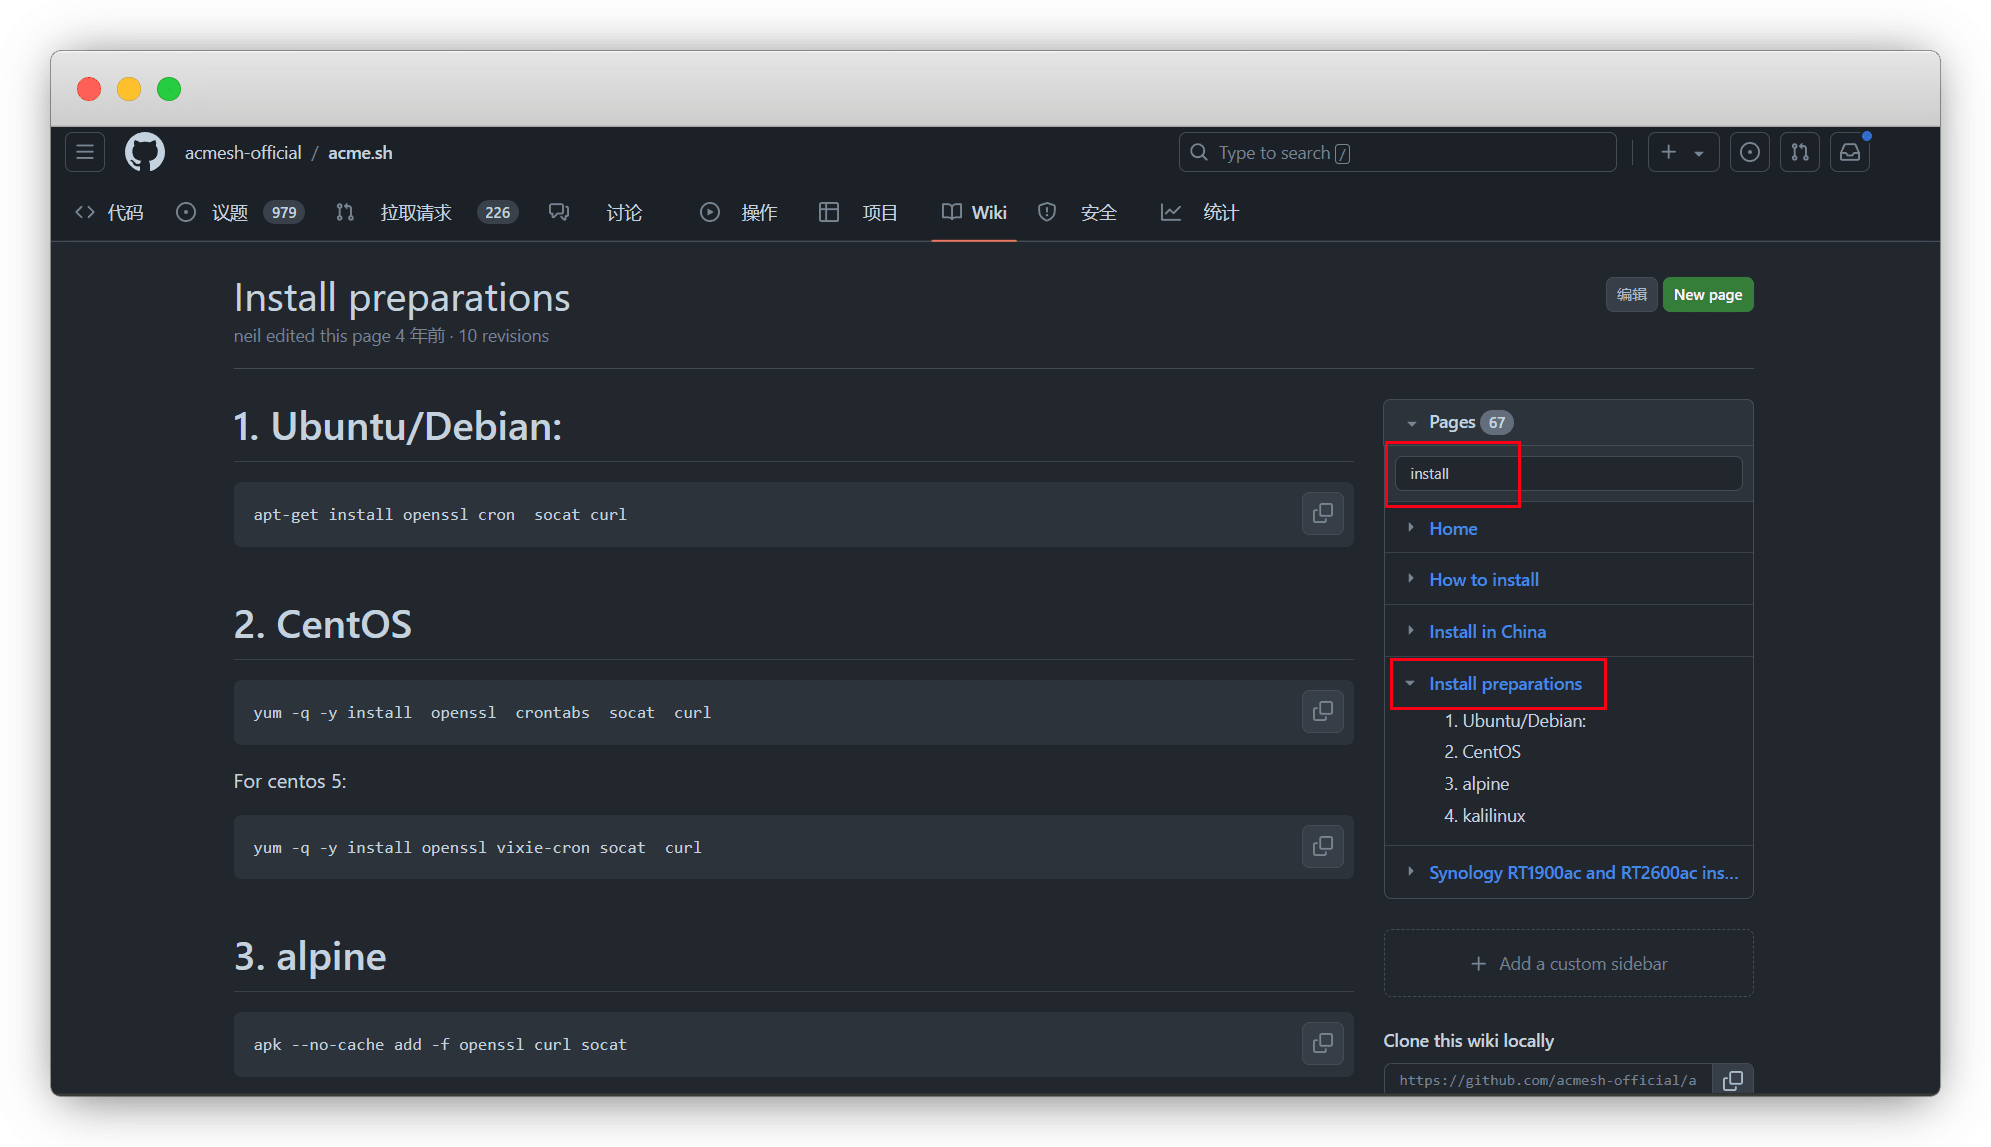
我是 Centos 系统,复制命令安装工具,像如下图提示,就是已经安装过了
yum -q -y install openssl crontabs socat curl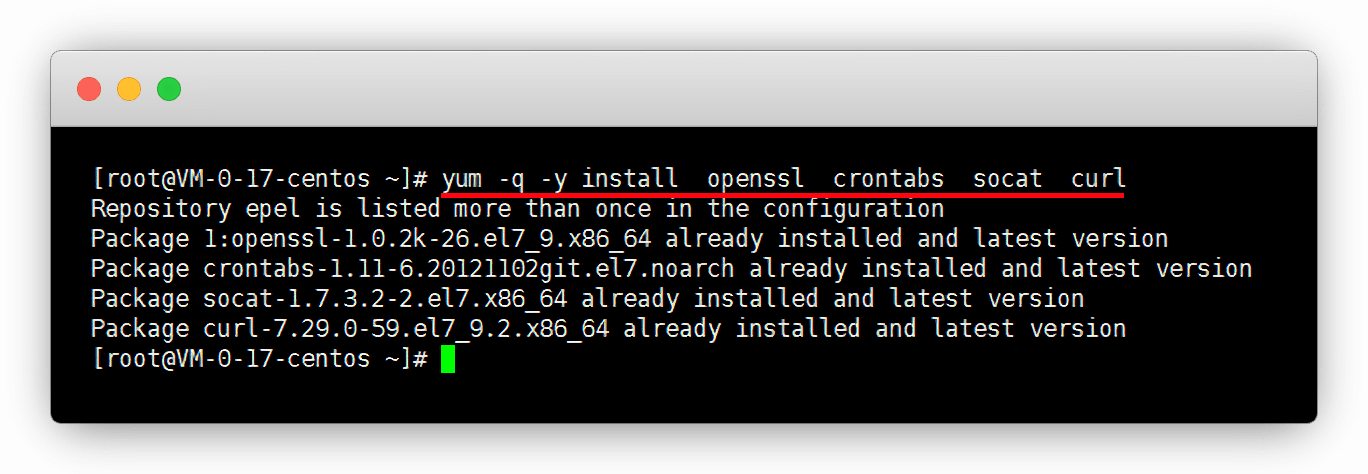
再次在 wiki,搜索 Install,点击 How-to-install
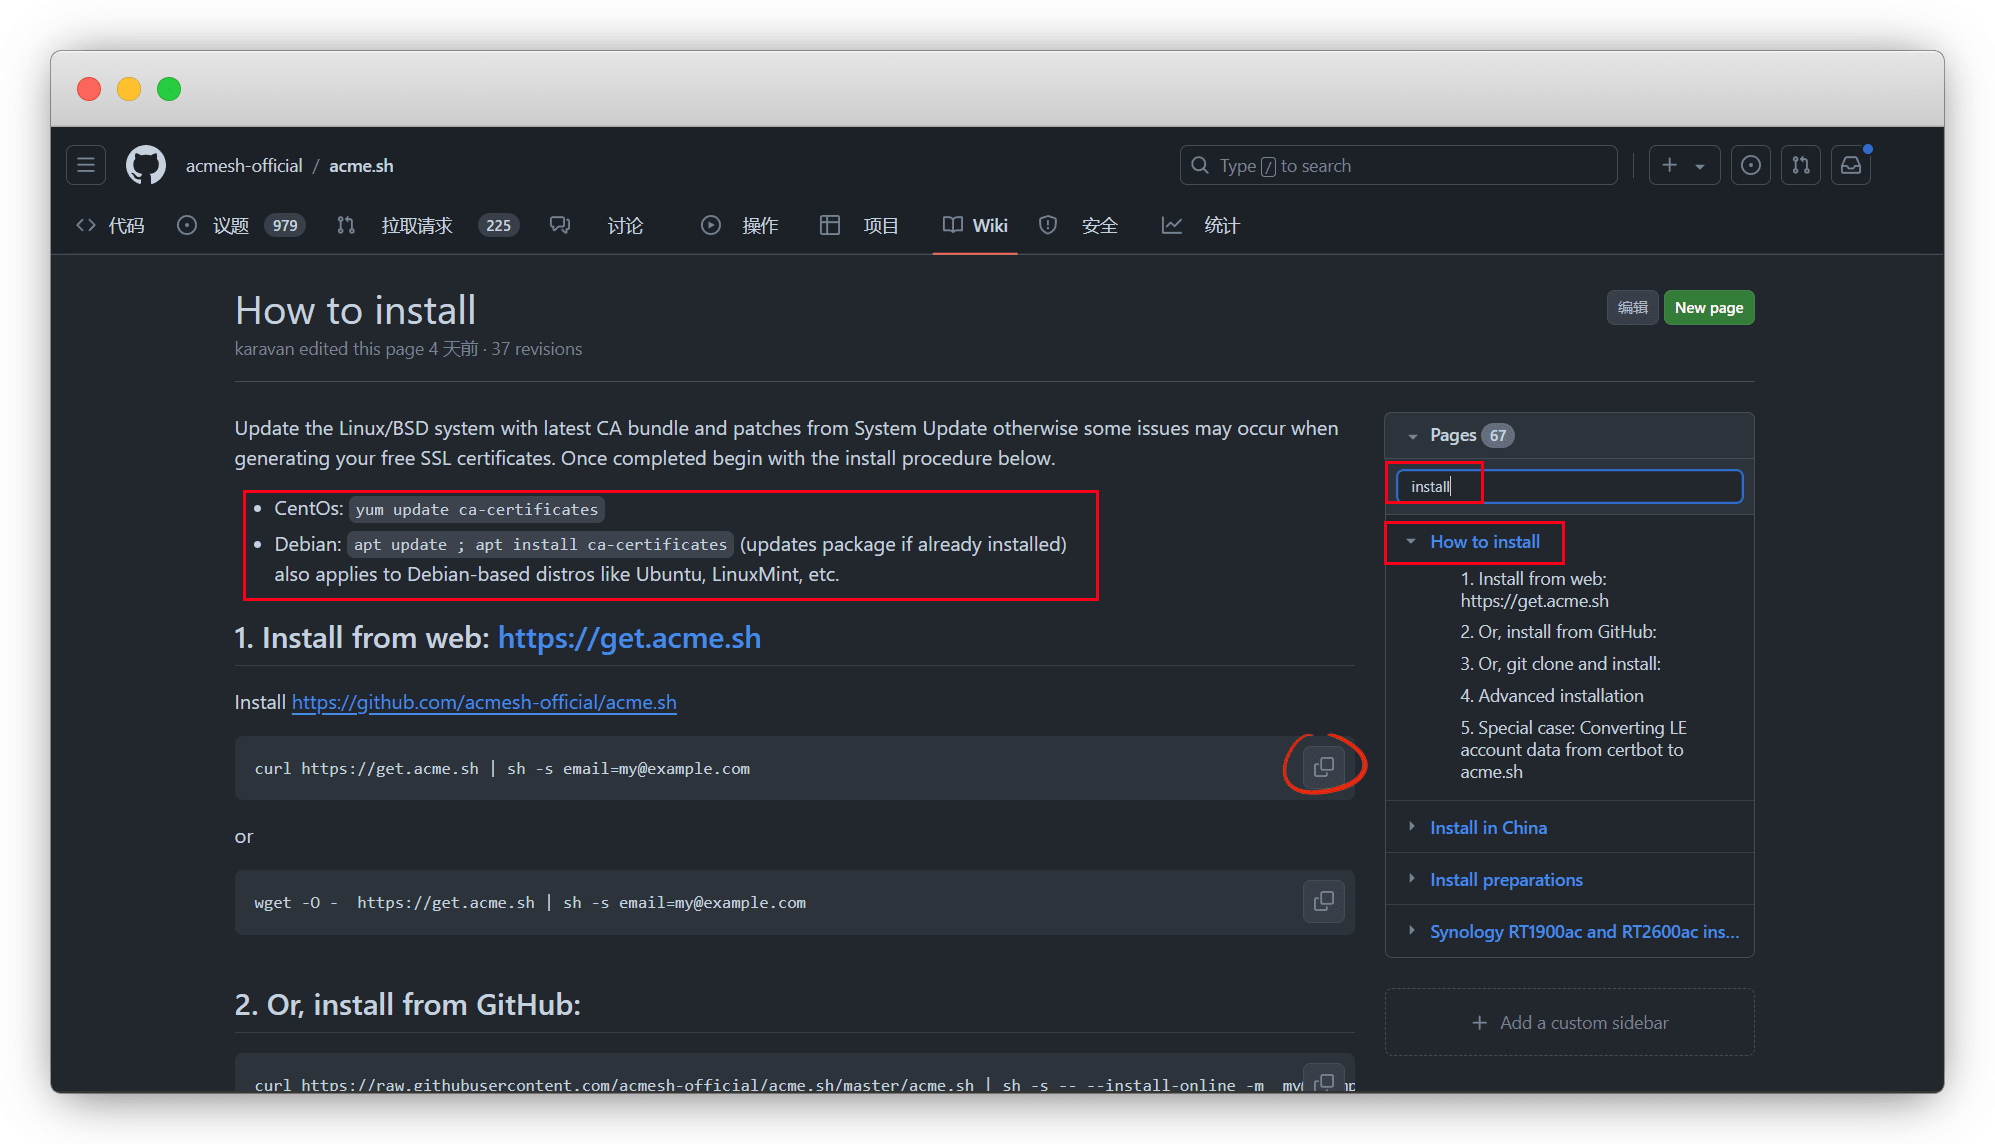
根据官方建议使用最新的CA包,以免生成证书出现问题,复制升级命令,提示输入y
yum update ca-certificates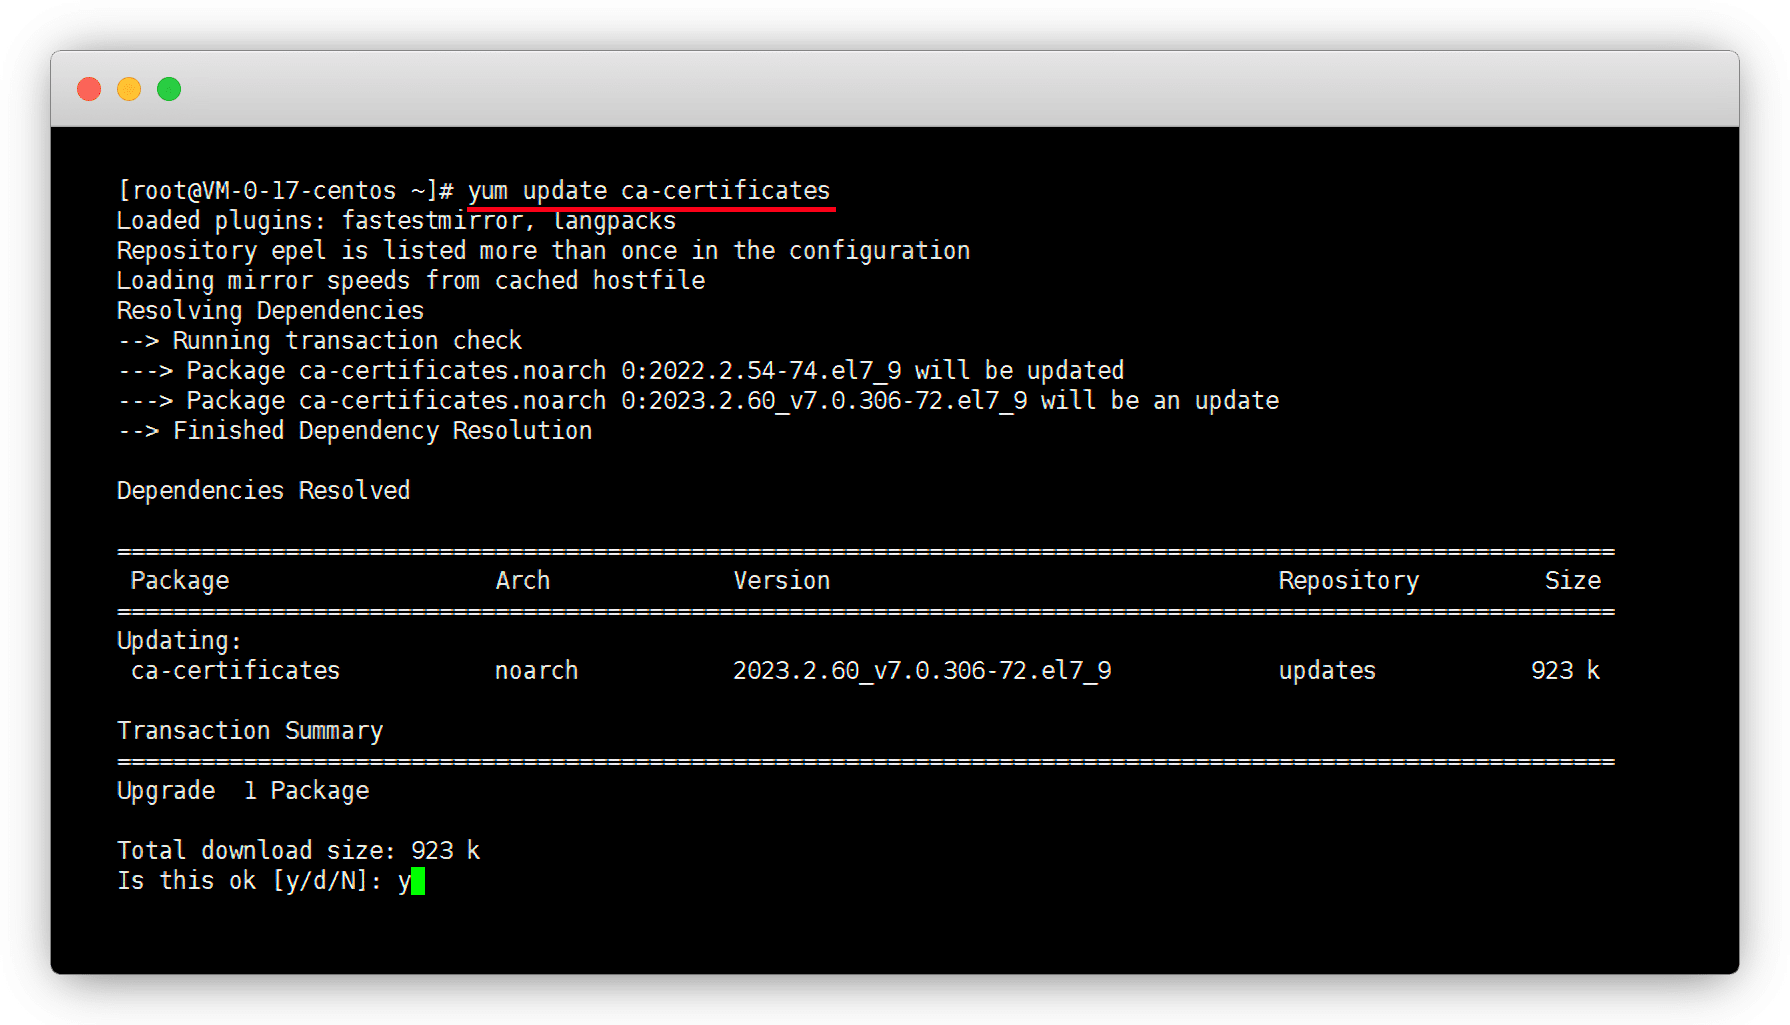
接下来正式开始安装,复制命令,将 my@example.com 改成自己的真实邮箱,粘贴到运行
curl https://get.acme.sh | sh -s email=my@example.com安装成功后,提示的命令是什么
- Installing to /root/.acme.sh:默认安装目录
- Installed to /root/.acme.sh/acme.sh:主程序目录
- Installing alias to '/root/.bashrc':安装别名.bashrc
- Installing alias to '/root/.cshrc':安装别名.cshrc
- Installing alias to '/root/.tcshrc':安装别名.tcshrc
- Installing cron job:定时任务
- Close and reopen your terminal to start using acme.sh:关闭SSH工具,重新连接使用
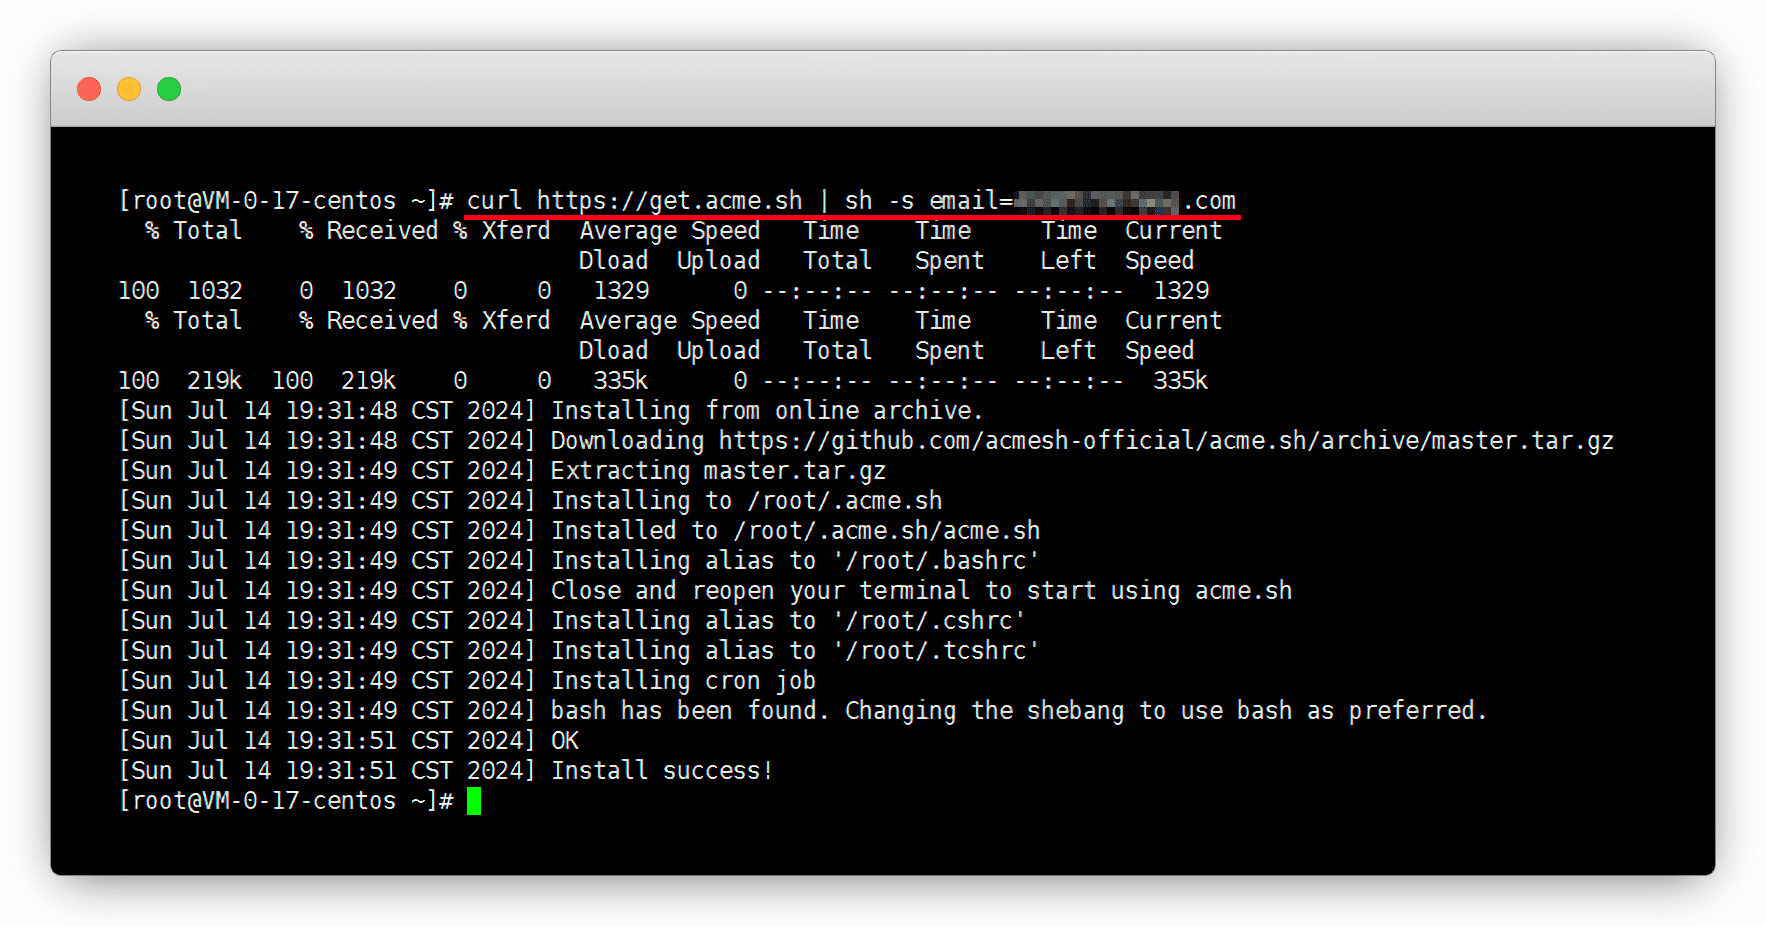
直接用 source 命令刷新bashrc配置文件,不需要重连,让别名生效
source /root/.bashrc
还默认给我们设置了一个定时任务,每天19点45分自动检测并更新证书
crontab -l
输入 acme.sh 可以查看当前版本及使用命令
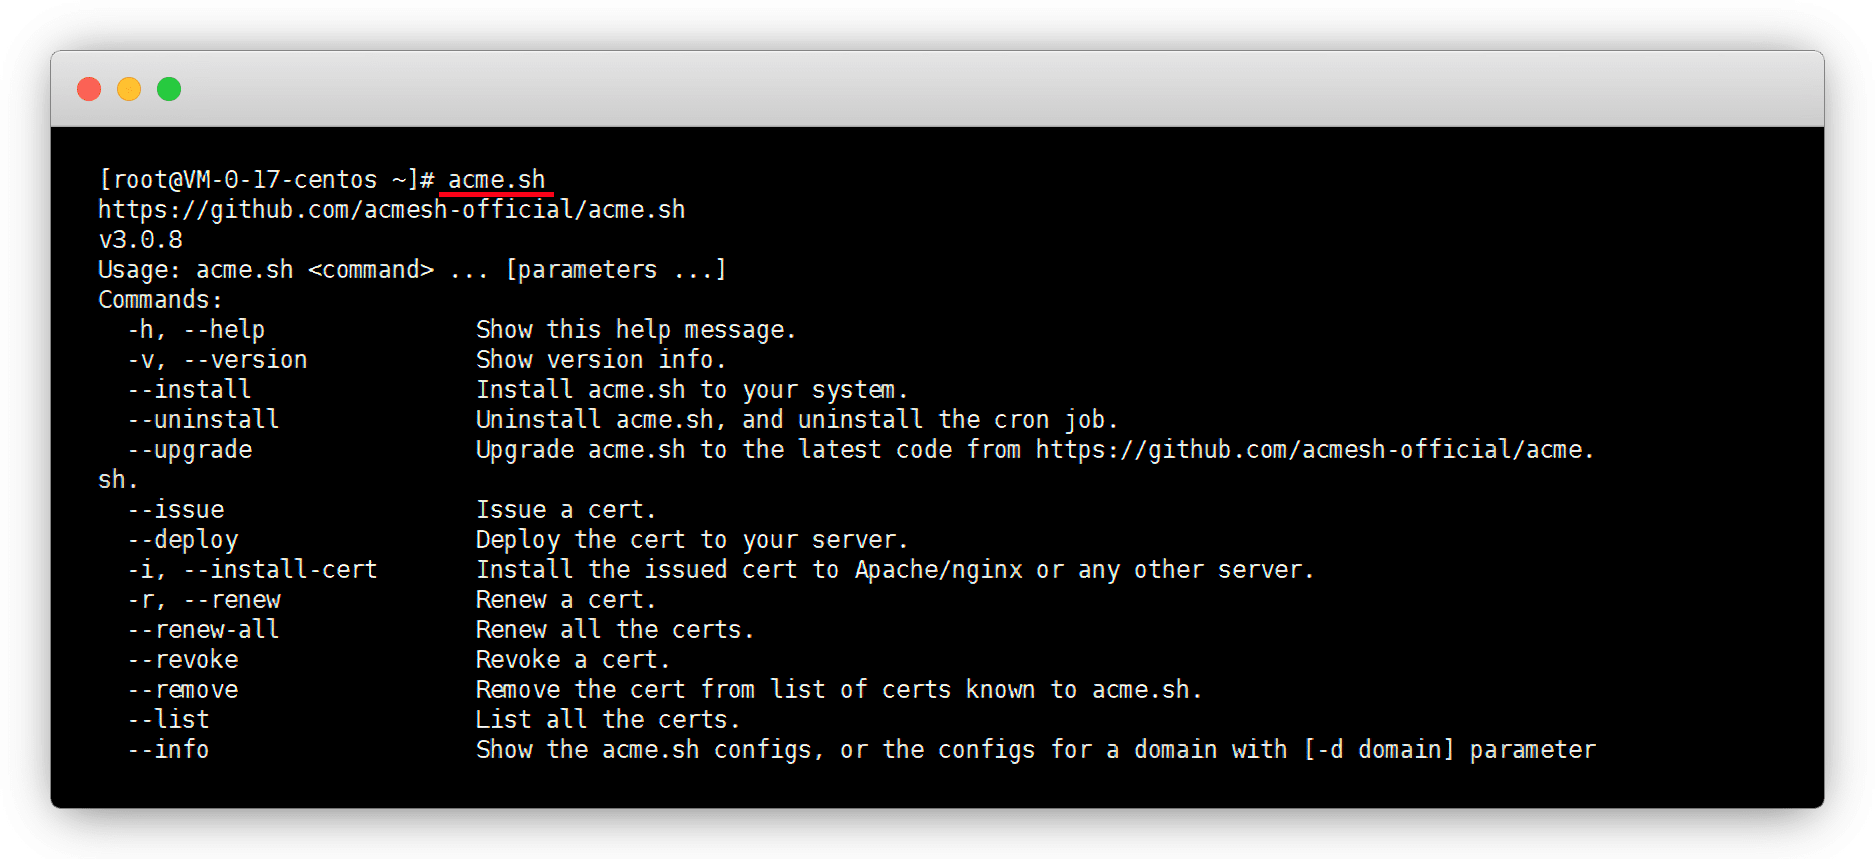
最后,我们升级并设置自动升级
acme.sh --upgrade --auto-upgrade
更改默认证书
现在默认CA是 ZeroSSL ,可 根据文档 按需修改
| CA机构 | 简称 | 天数 | 域名数量 | 通配符 | ECC | IDNs |
|---|---|---|---|---|---|---|
| Let's Encrypt | letsencrypt | 90天 | 100个 | ✔️ | ✔️ | ✔️ |
| ZeroSSL | zerossl | 90天 | 100个 | ✔️ | ✔️ | ✔️ |
| 90天 | 100个 | ✔️ | ✔️ | ❌ | ||
| Buypass | buypass | 180天 | 5个 | 💲付费 | ✔️ | ✔️ |
| SSL.com | sslcom | 90天 | 2个 | 💲付费 | ✔️ | ✔️ |
用命令看一下默认的CA
acme.sh --info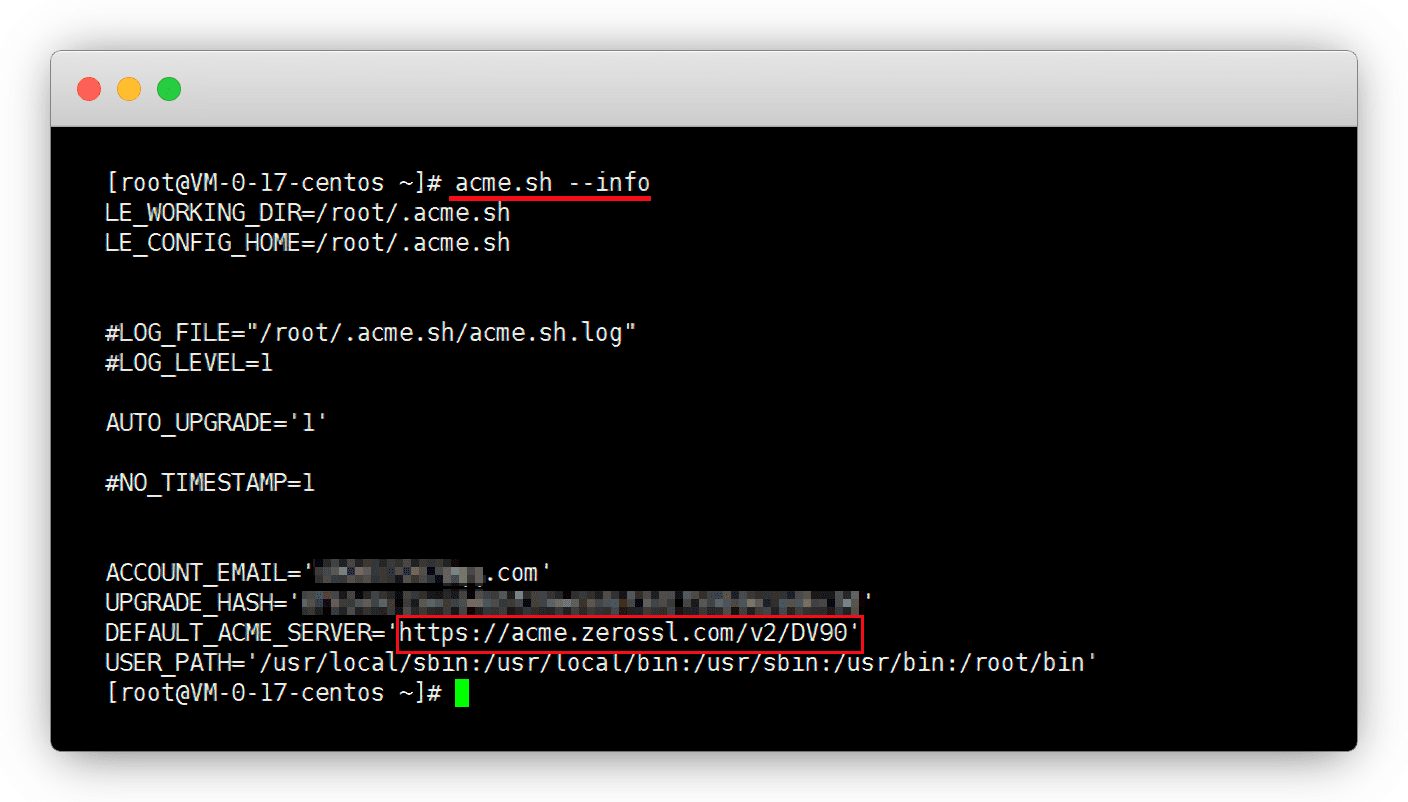
我们可以改成Let's Encrypt或其他
acme.sh --set-default-ca --server letsencrypt
申请证书
在 wiki,搜索 issue,点击 How to issue a cert
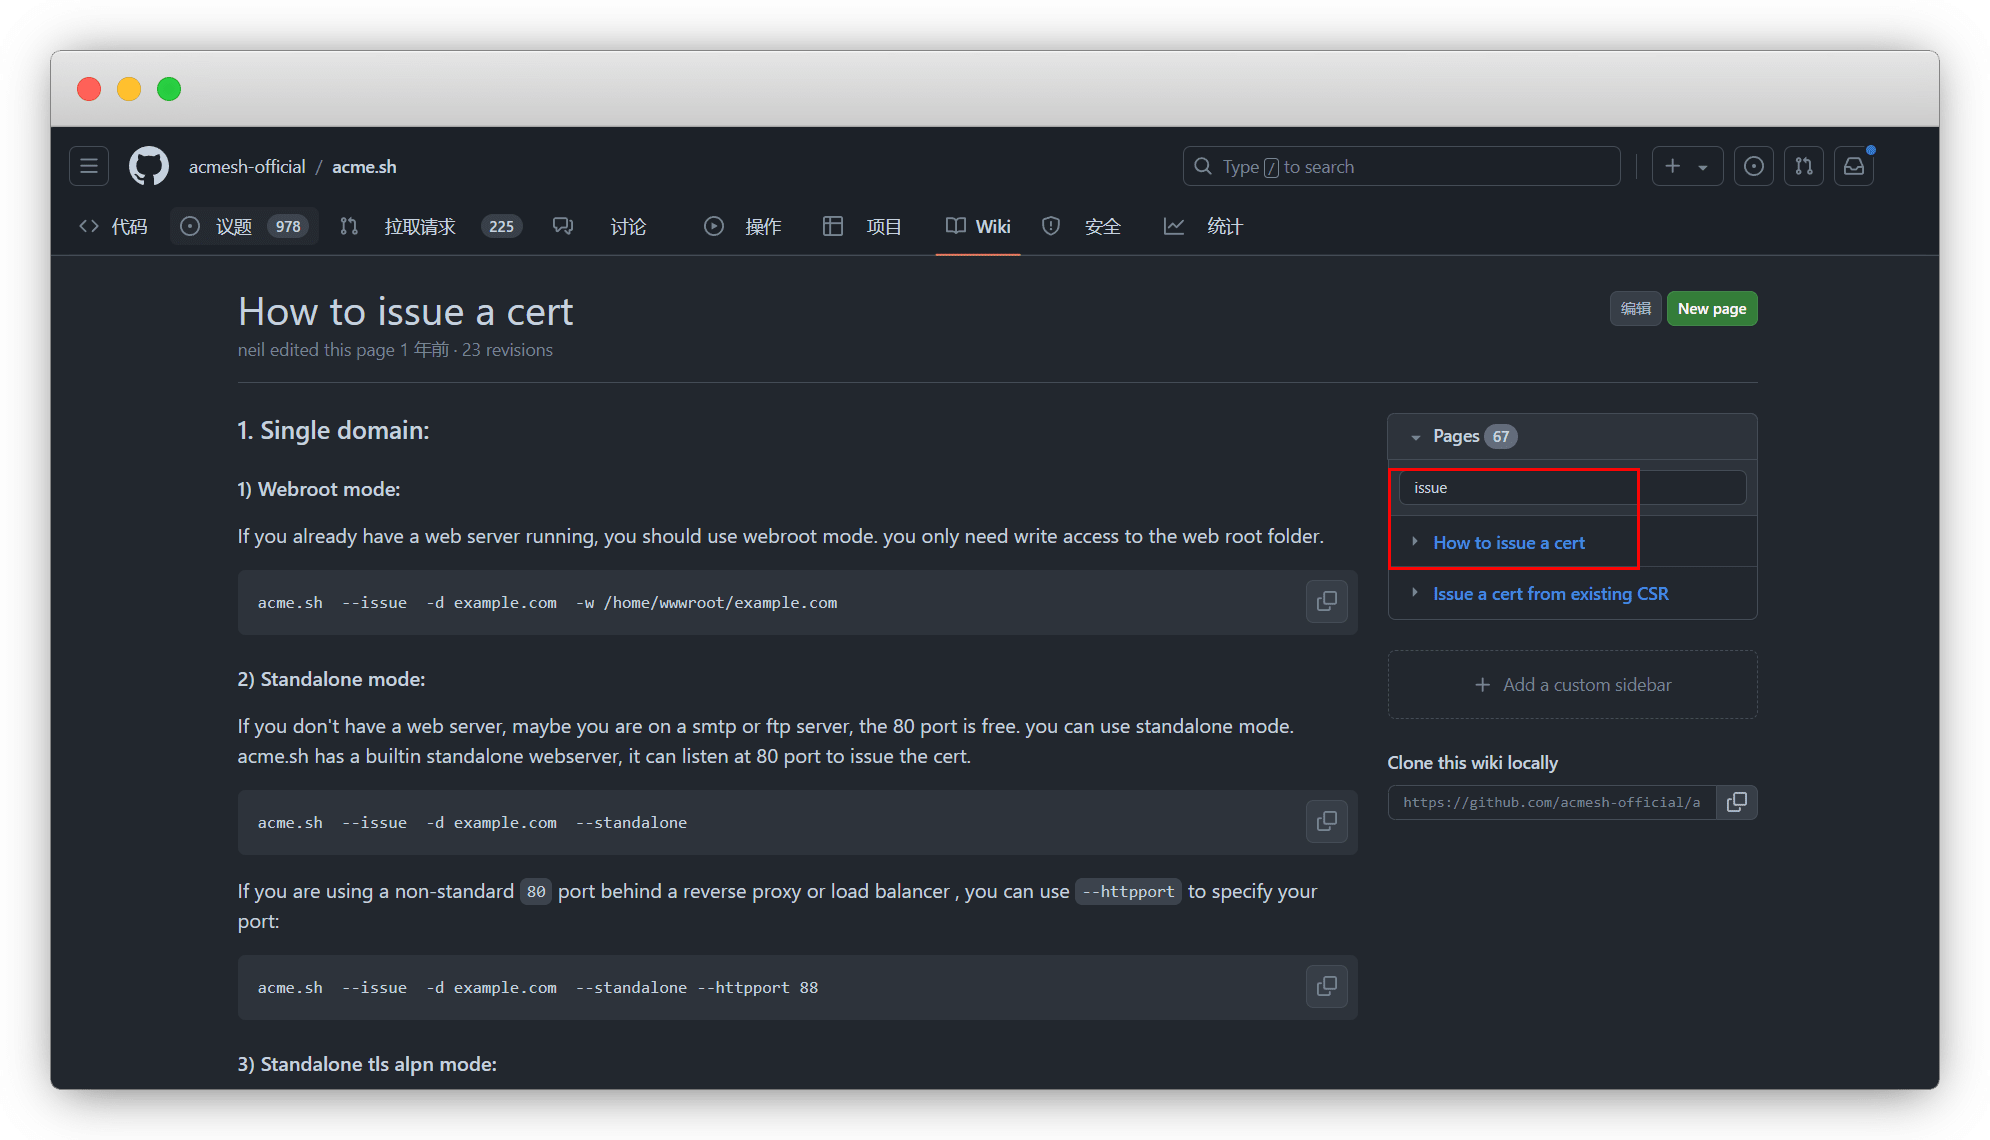
| 申请模式 | 单域名 | 多域名 | 泛域名 | 方式 |
|---|---|---|---|---|
| webroot | ✔️ | ✔️ | ❌ | http文件验证,需有Nginx等web服务器 |
| Standalone | ✔️ | ✔️ | ❌ | http文件验证,内置的独立 Web 服务器 |
| Standalone tls alpn | ✔️ | ✔️ | ❌ | http文件验证,内置的独立 TLS Web 服务器 |
| ⭐ DNS API 推荐 | ✔️ | ✔️ | ✔️ | DNS自动验证,域名商支持API,可通过api自动添加txt记录 |
| DNS manual | ✔️ | ✔️ | ✔️ | DNS手动验证,域名商不支持API,可通过手动添加txt记录 |
| DNS alias | ✔️ | ✔️ | ✔️ | DNS别名验证,域名商A不支持API,域名商B支持API,将域名商A的域名指向域名商B使用 |
| Apache | ✔️ | ✔️ | ❌ | Apache验证,实际也是http文件验证,直接使用 apache 来颁发证书 |
| Nginx | ✔️ | ✔️ | ❌ | Apache验证,实际也是http文件验证,直接使用 nginx 来颁发证书 |
| 混合模式 | ✔️ | ✔️ | ❔ | 所有申请模式混合使用 |
webroot
通过自动创建 .well-known 文件夹并生成验证文件,CA访问文件所在的链接验证
申请完成后,会告知我们证书所在的文件夹
说明
- --issue:颁发证书
- -d:指定需要申请证书的域名
- -w:使用webroot模式,并指定网站所在的目录,一般为
www。为什么官方是/home/呢,因为这是非root用户目录
# 单域名
acme.sh --issue -d example.com -w /www/wwwroot/example.com

# 多域名
acme.sh --issue -d example.com -d www.example.com -w /www/wwwroot/example.com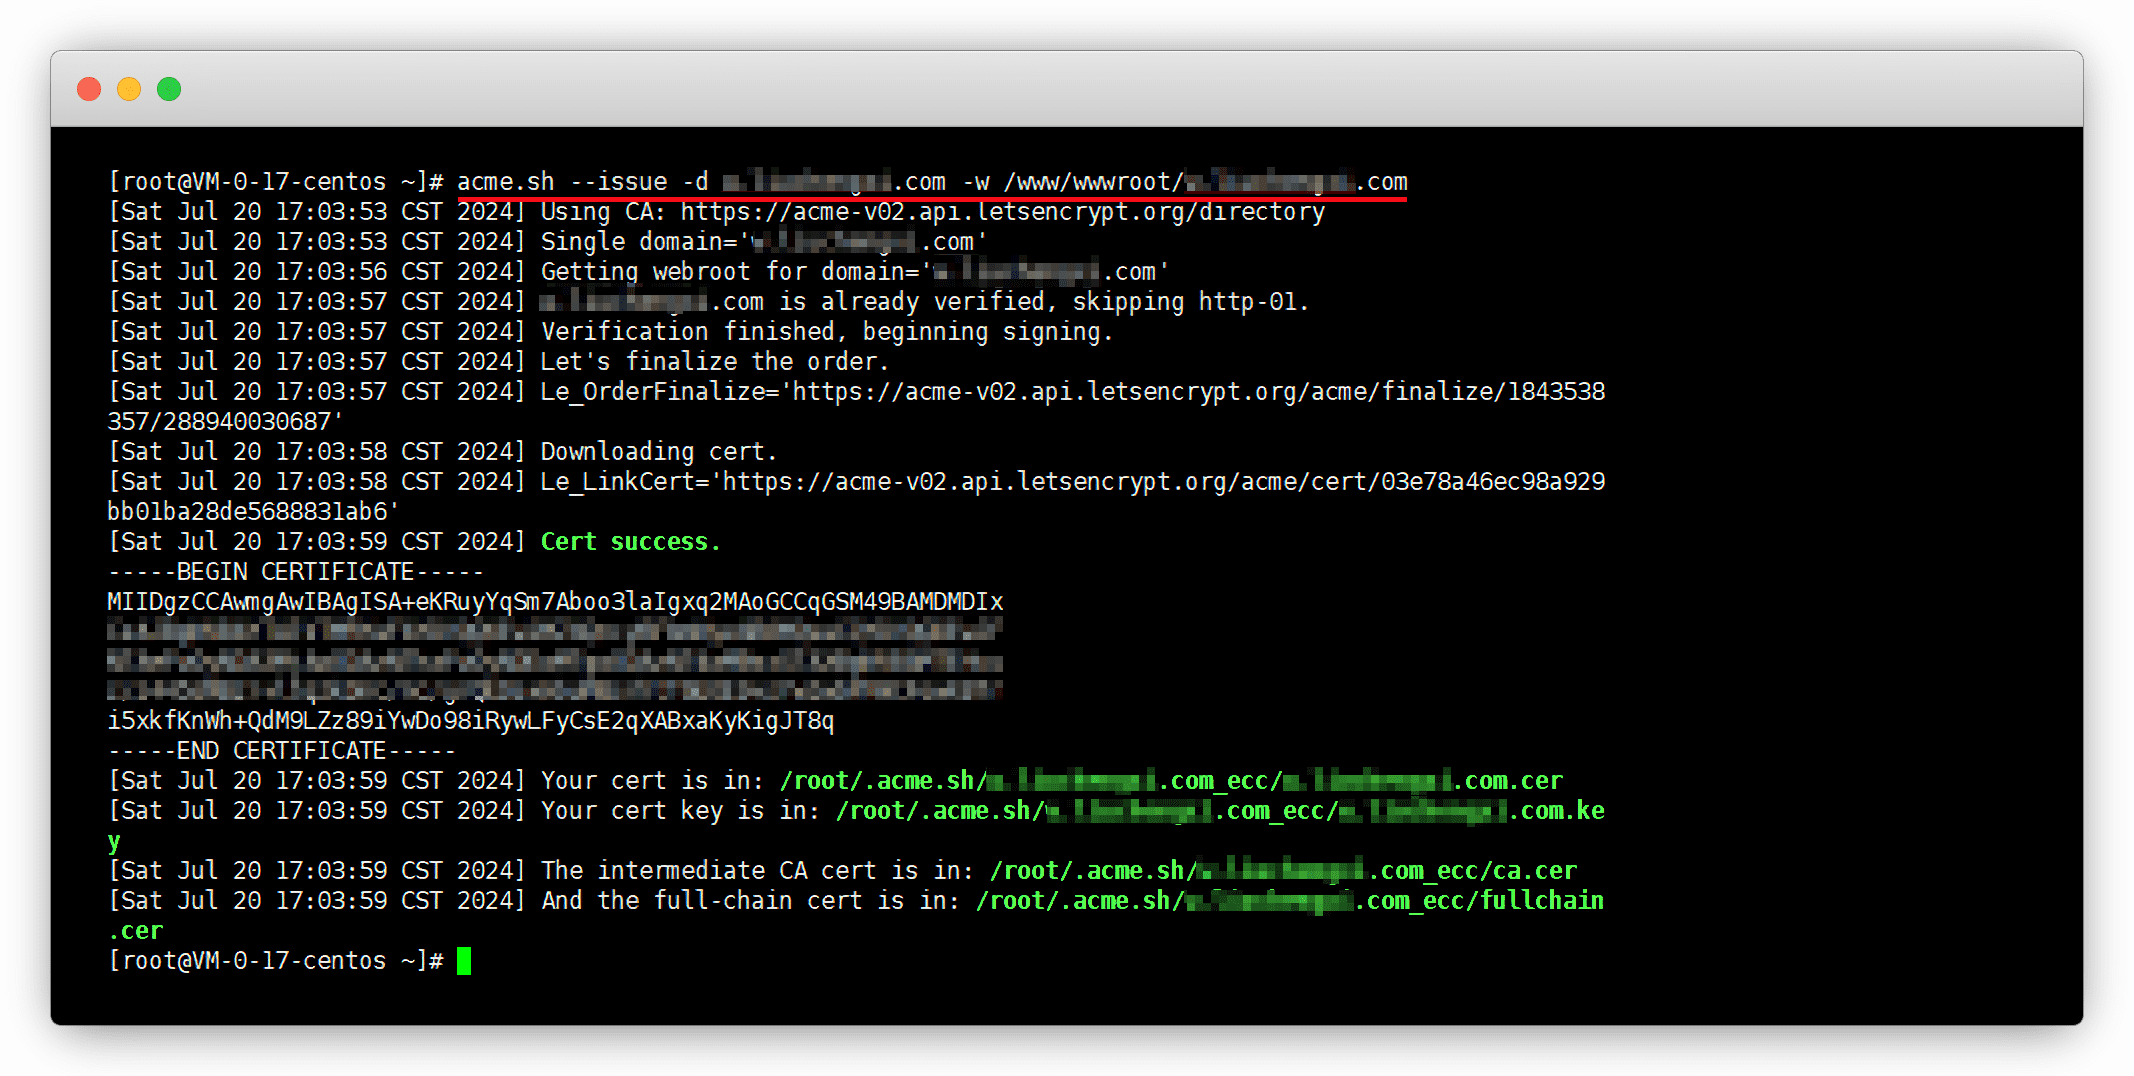
Standalone
独立模式,此方式需要占用80端口
# 查看80端口占用情况
lsof -i :80 | grep LISTEN
未占用就直接申请,如下图被占用,改端口申请即可

申请完成后,会告知我们证书所在的文件夹
说明
- --issue:颁发证书
- -d:指定需要申请证书的域名
- --standalone:使用独立模式
- --httpport:指定端口
# 单域名
acme.sh --issue -d example.com --standalone

# 单域名改用88端口
acme.sh --issue -d example.com --standalone --httpport 88

# 多域名
acme.sh --issue -d example.com -d www.example.com --standalone

# 多域名改用88端口
acme.sh --issue -d example.com -d www.example.com --standalone --httpport 88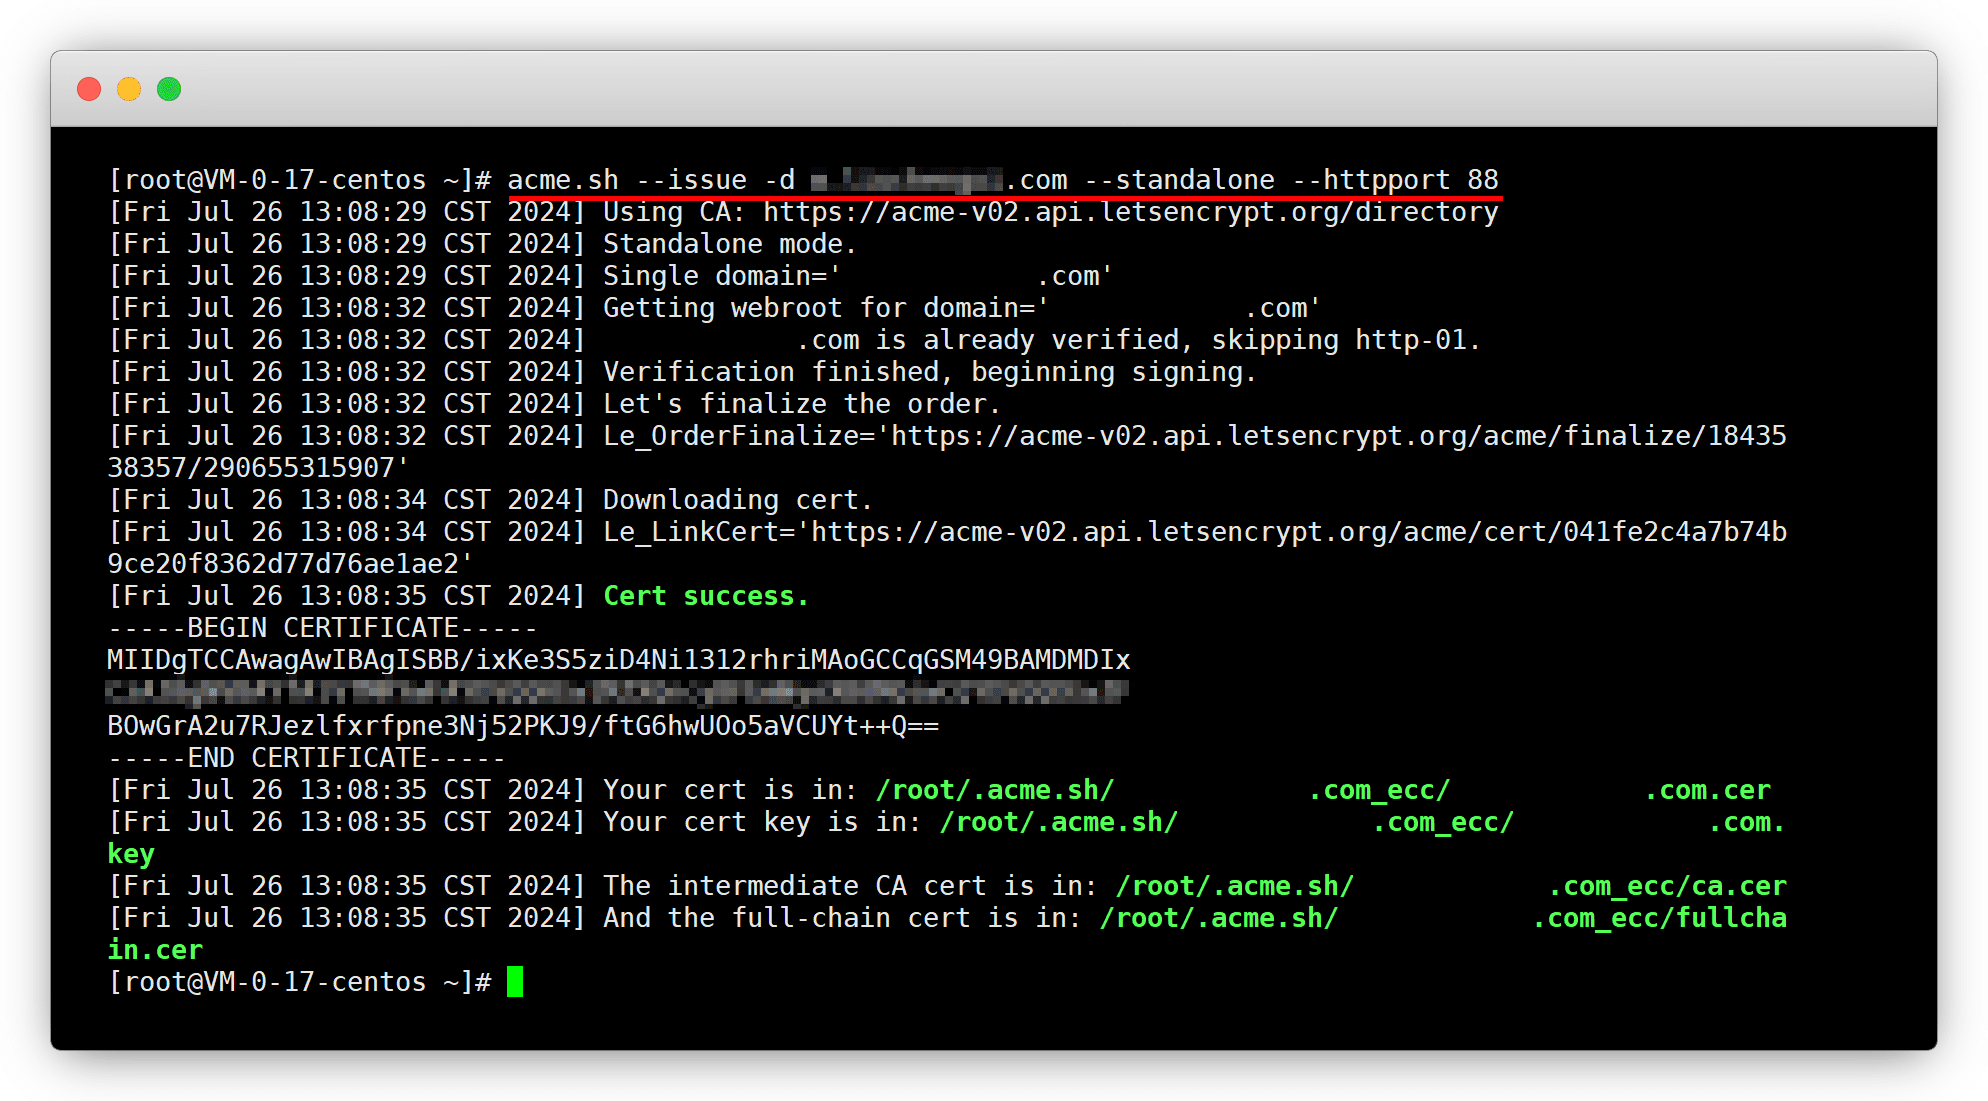
Standalone tls alpn
使用独立模式TLS,此方式需要占用443端口
# 查看443端口占用情况
lsof -i :443 | grep LISTEN
未占用就直接申请,如下图被占用,改端口申请即可

申请完成后,会告知我们证书所在的文件夹
说明
- --issue:颁发证书
- -d:指定需要申请证书的域名
- --alpn:使用独立模式TLS
- --httpport:指定端口
# 单域名
acme.sh --issue -d example.com --alpn

# 单域名改用8443端口
acme.sh --issue -d example.com --alpn --tlsport 8443

# 多域名
acme.sh --issue -d example.com -d www.example.com --alpn

# 多域名改用8443端口
acme.sh --issue -d example.com -d www.example.com --alpn --tlsport 8443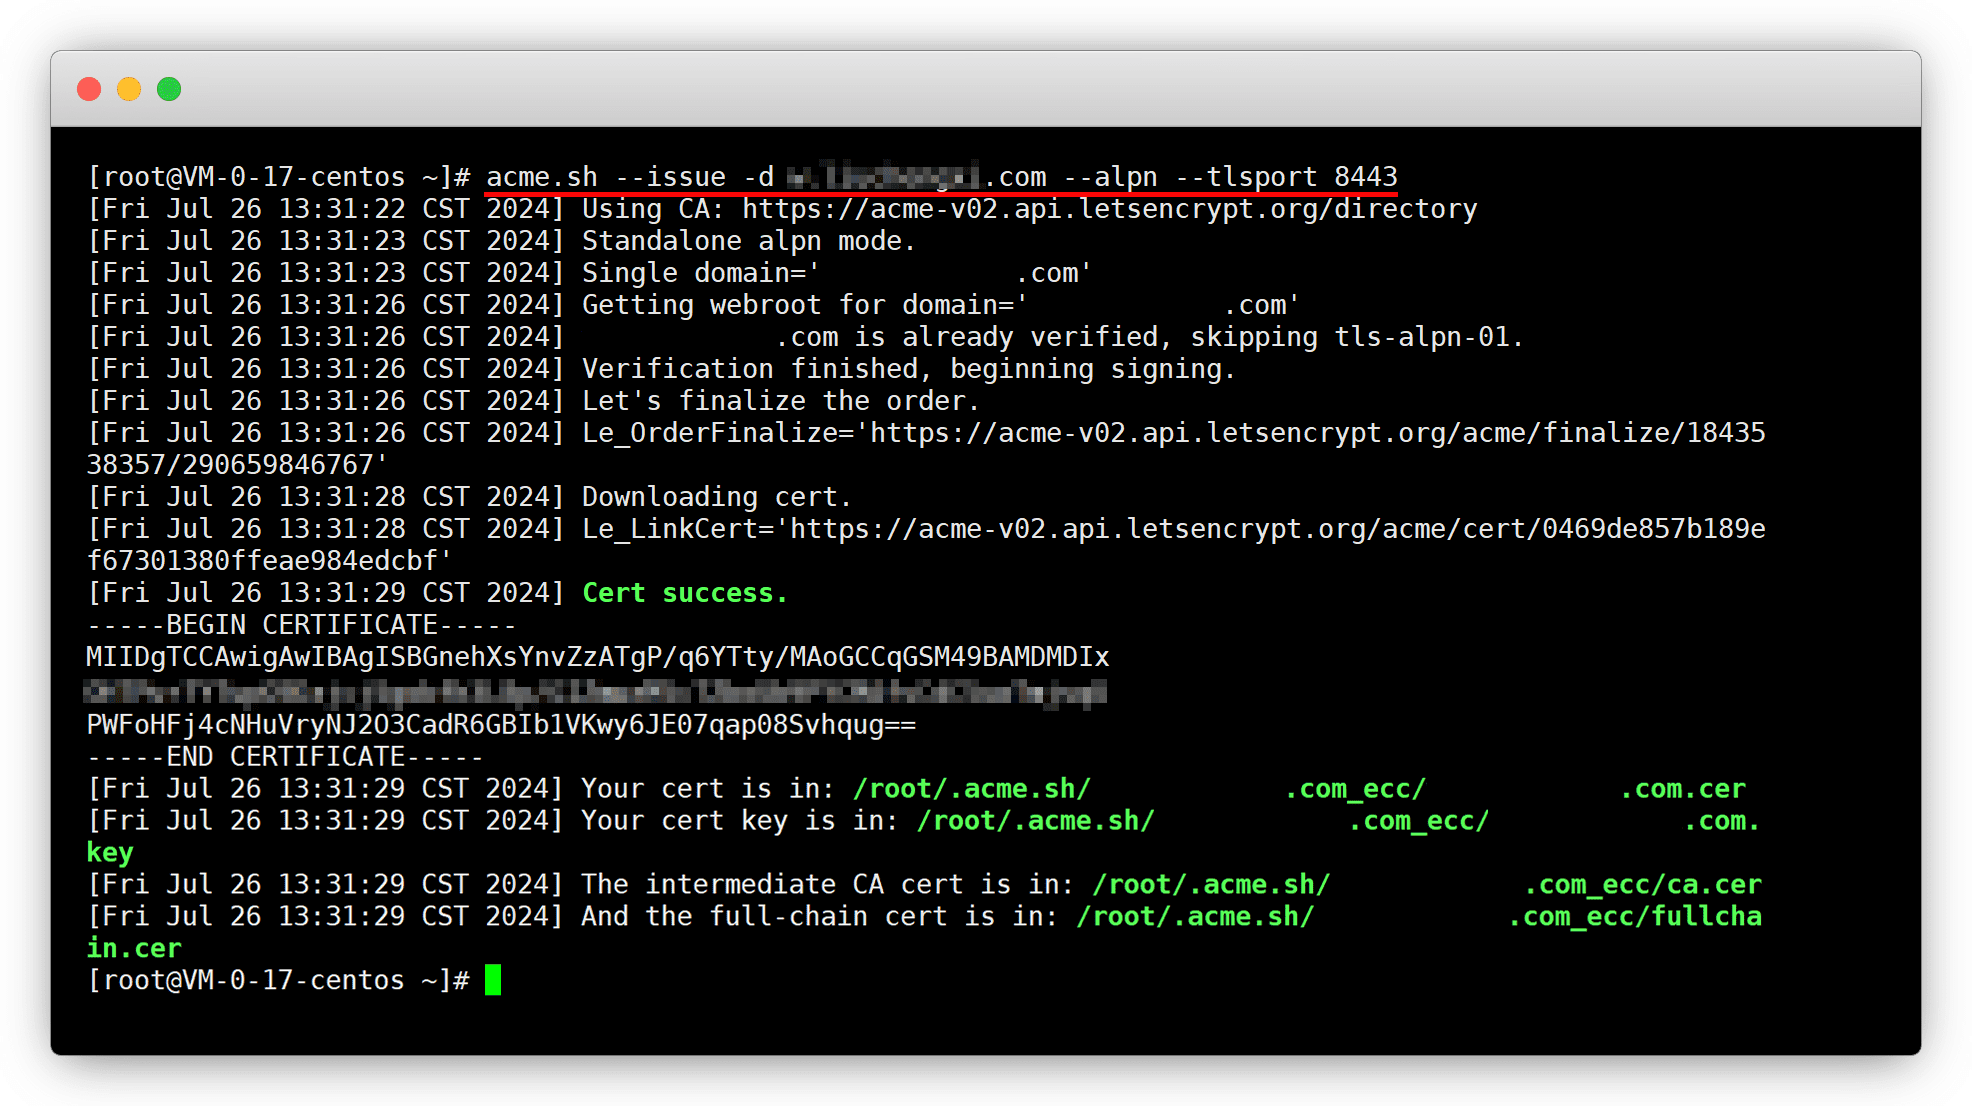
DNS API ⭐
在 wiki,搜索 dnsapi,在 dnsapi 或 dnsapi2 找到自己的域名提供商
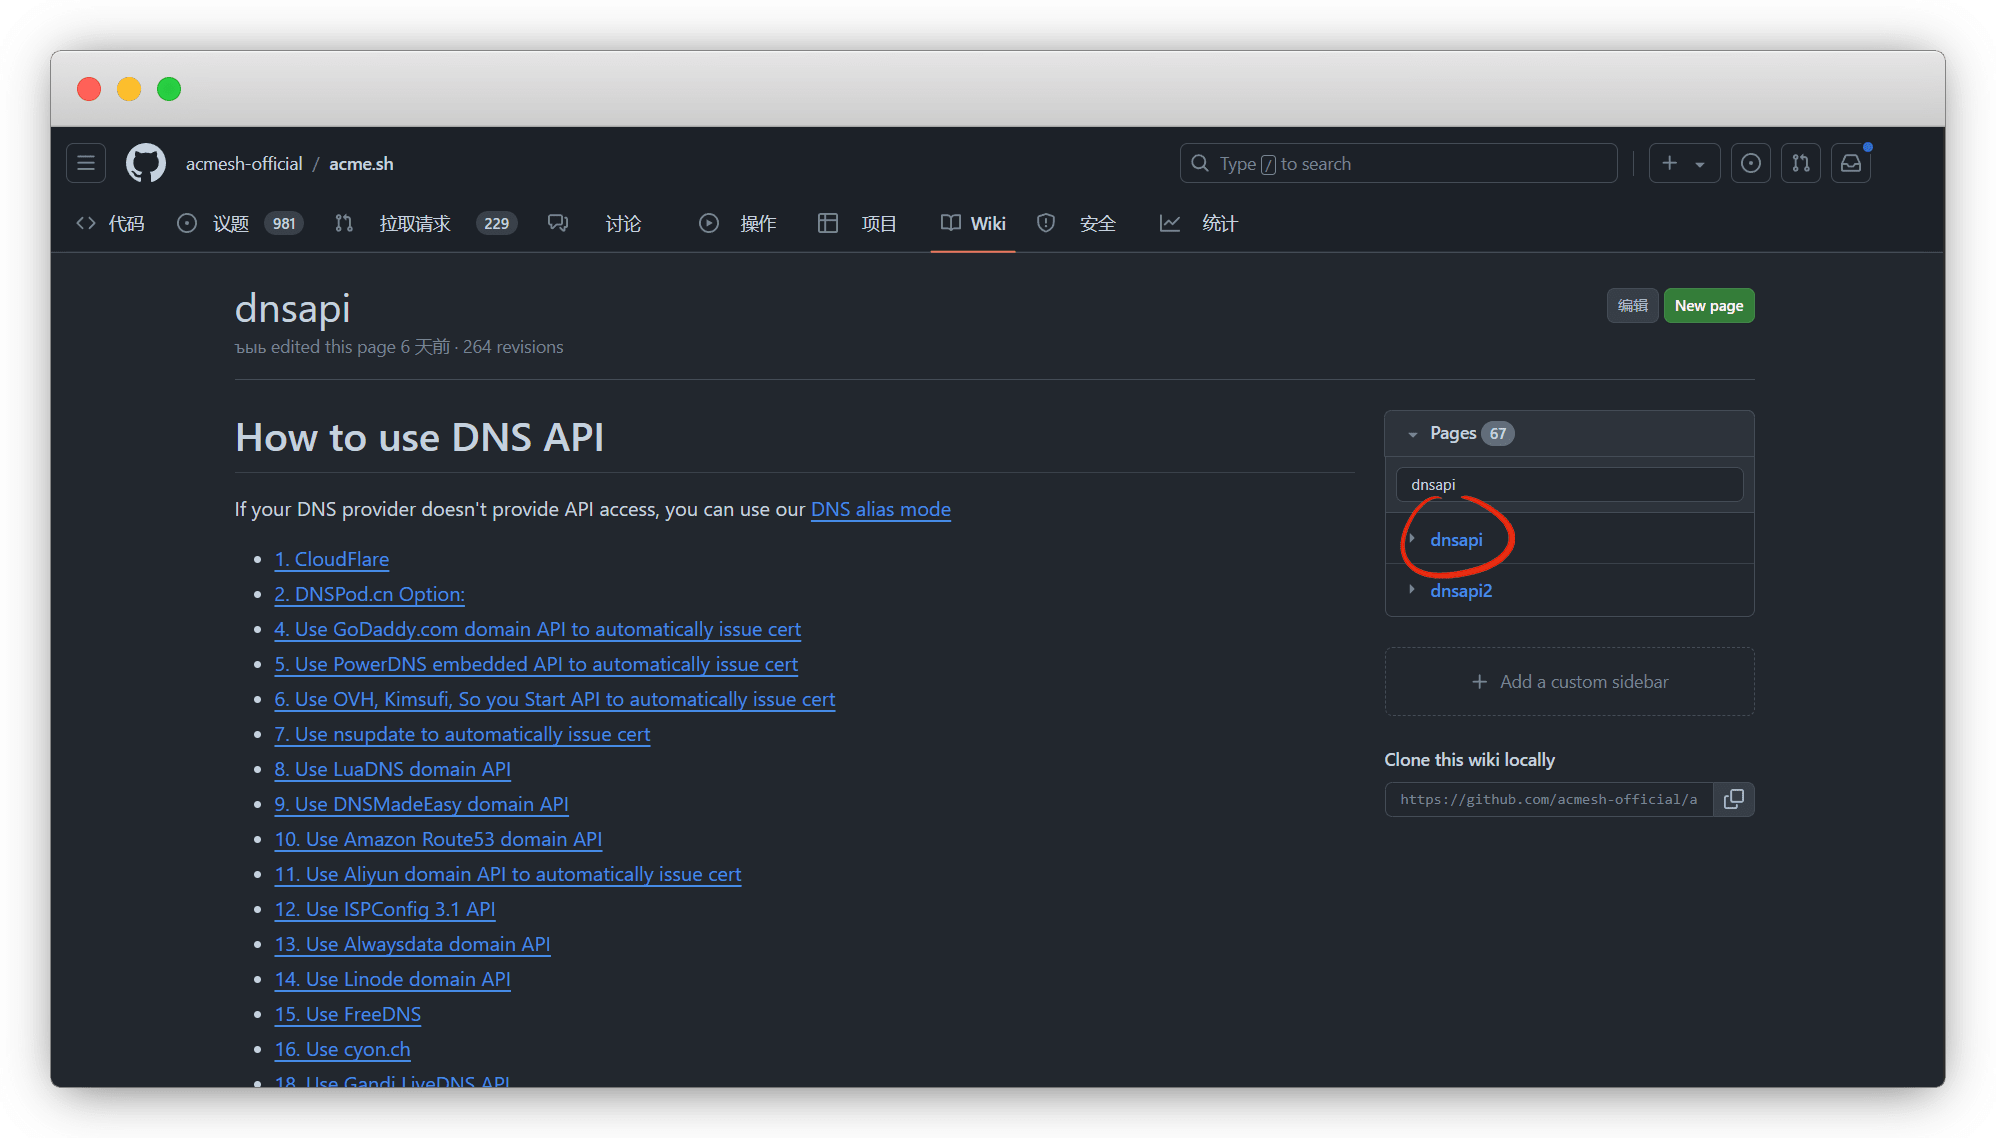
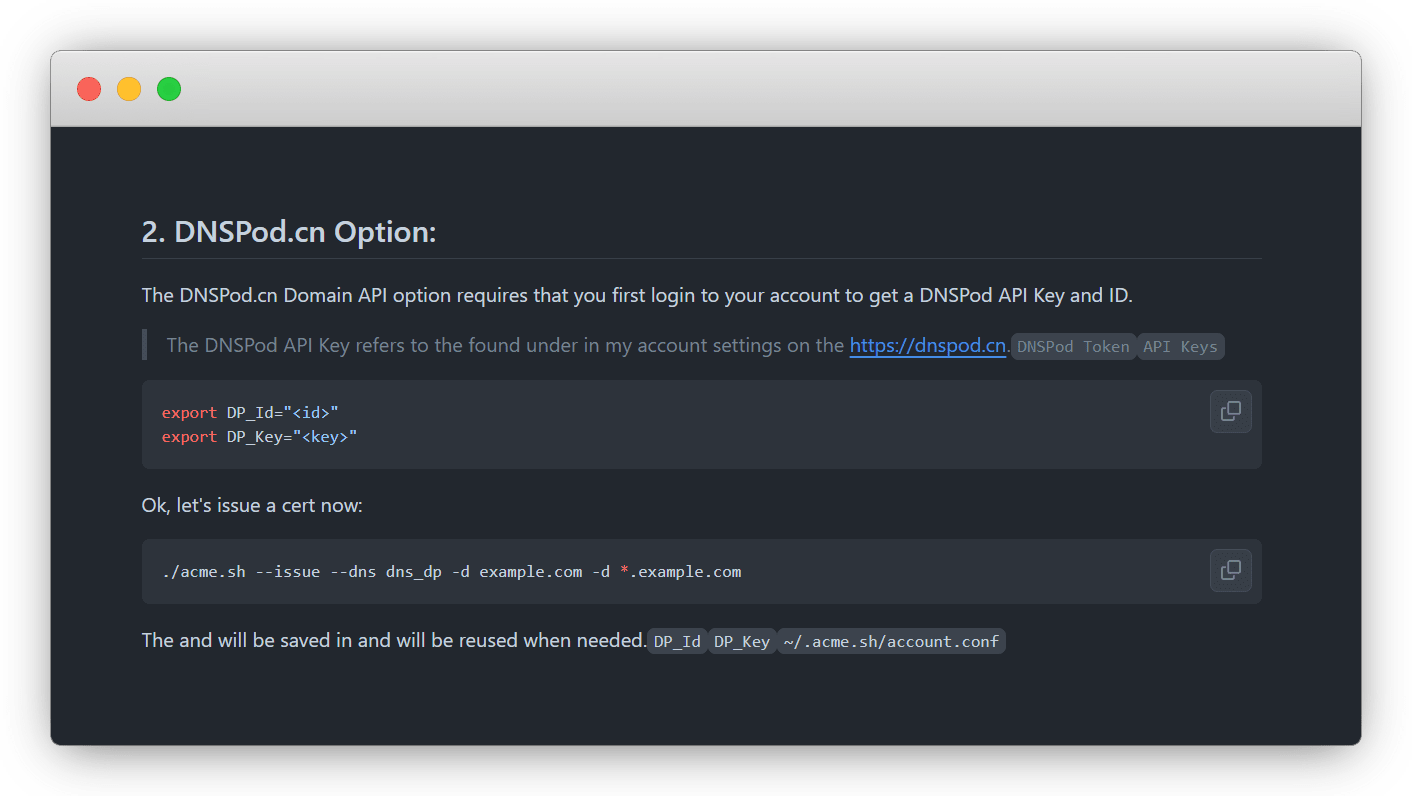
我的域名是腾讯旗下的 DNSPod ,我用它演示
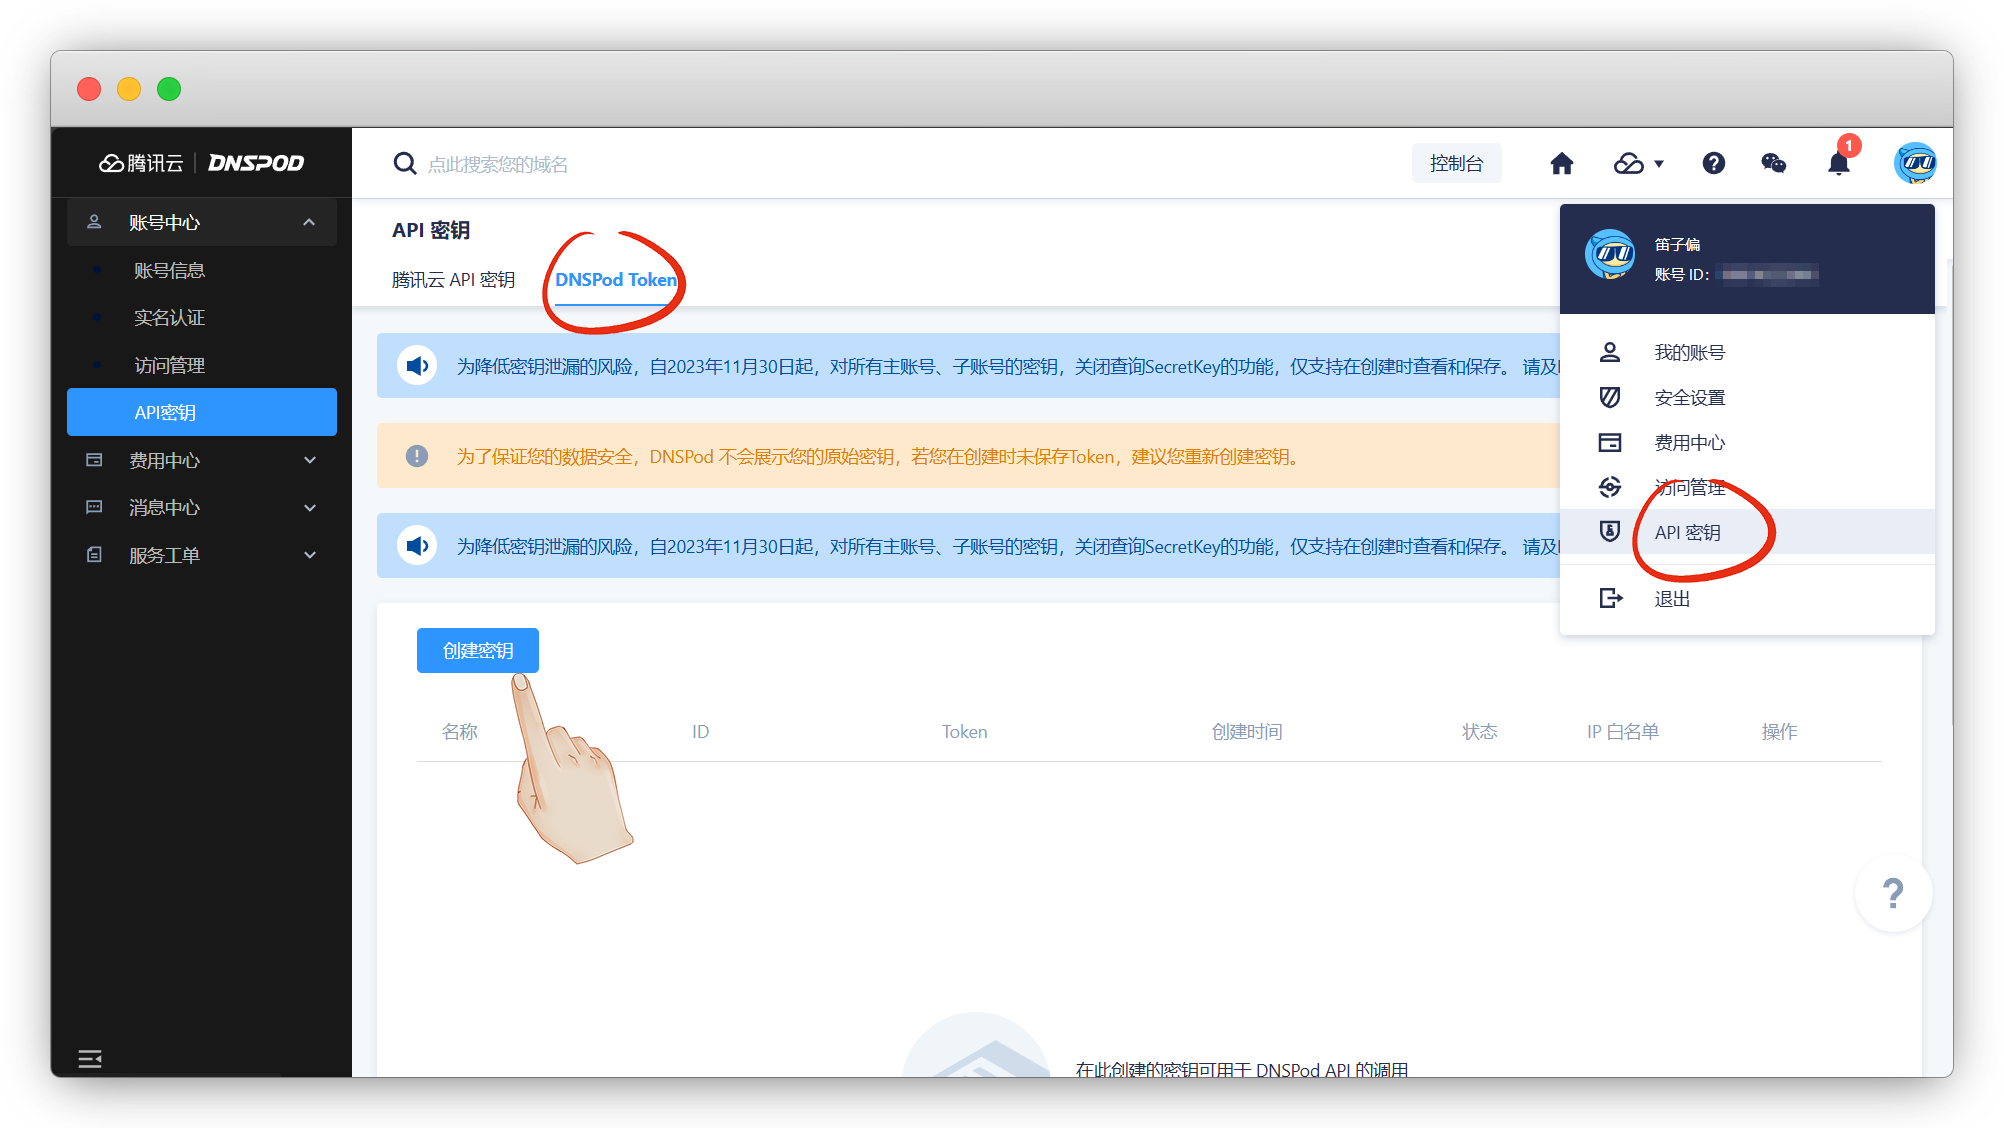
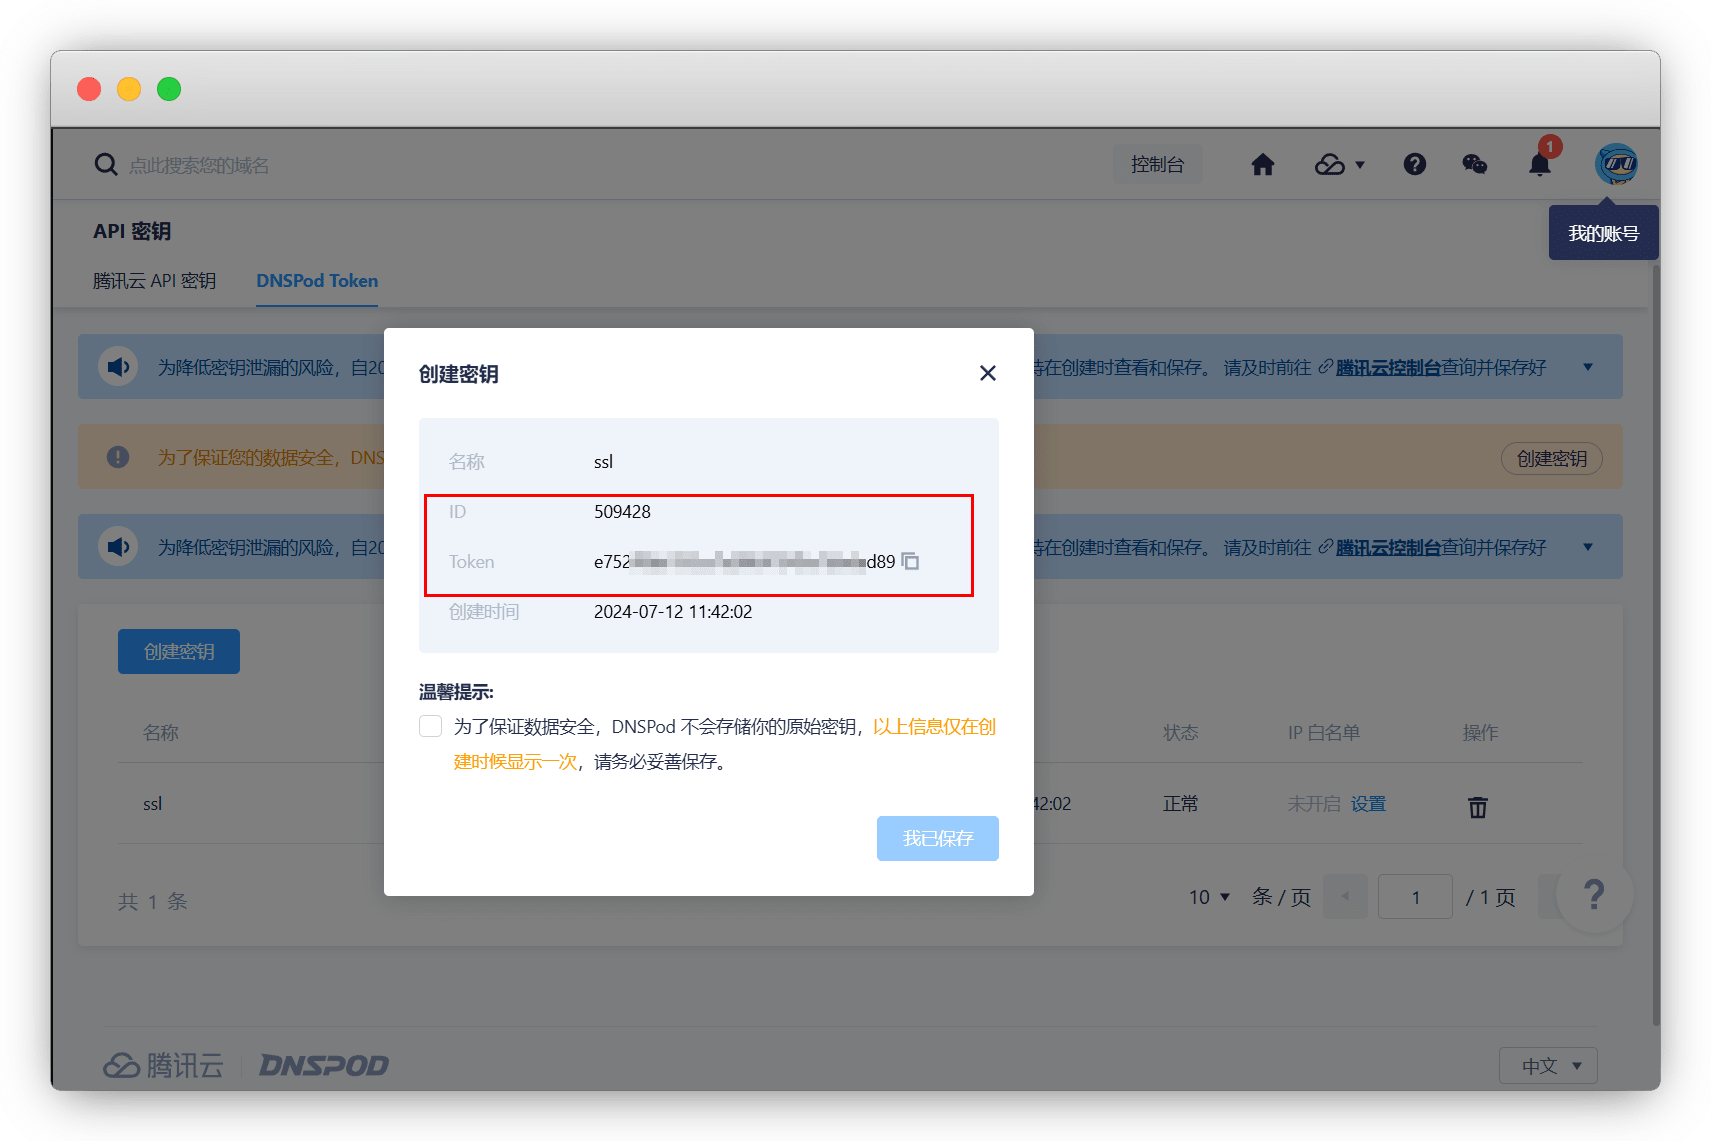
在 DnsPod后台 - 用户 - API密钥 - DnsPod Token,创建密钥
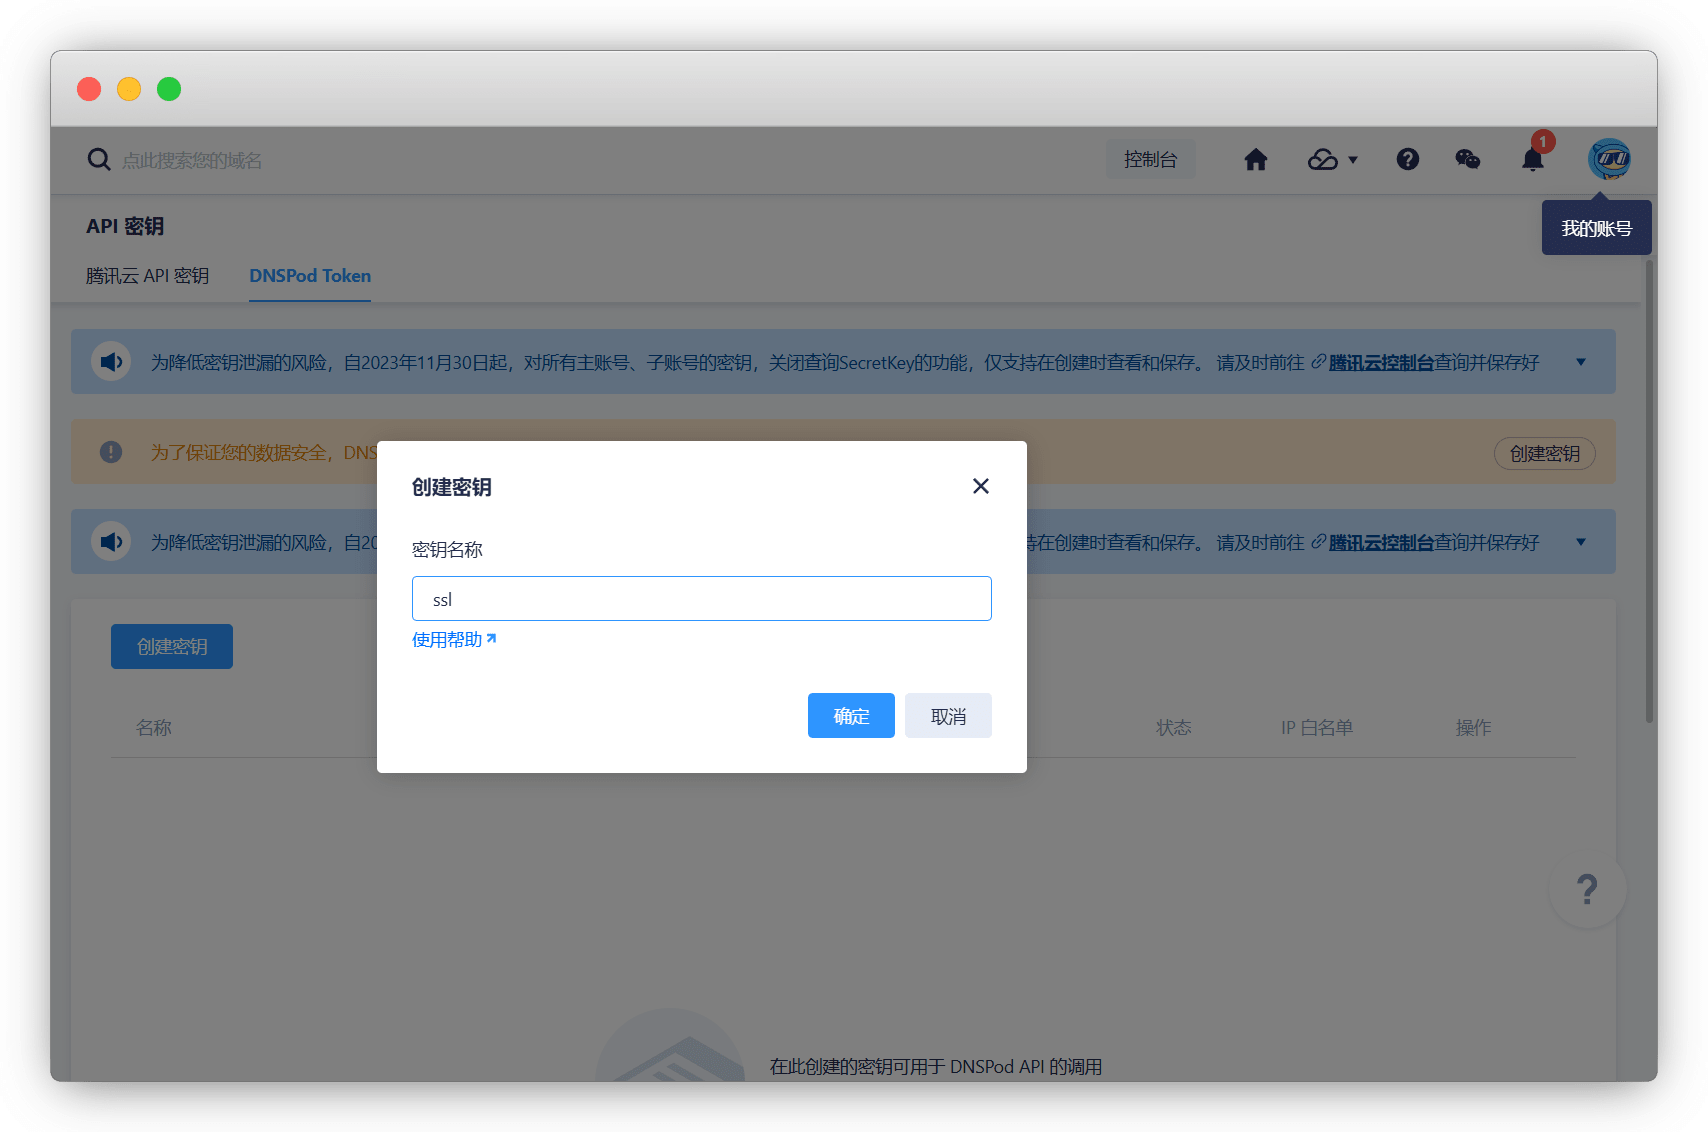
名称随便输吧
这里的 ID 和 Token 分别复制,填入
注意!token只显示一次!
export DP_Id="<id>"
export DP_Key="<key>"
DP_Id 和 DP_Key 忘记了咋办
如果你已经填入服务器了,直接 env 查看环境变量即可,如果没有,那就重新创建
env
# 在输出中找到
# DP_Key=******
# DP_Id=***
一次配置永久有效,以后使用直接申请即可
说明
- --issue:颁发证书
- -d:指定需要申请证书的域名
- --dns:使用DNS验证
- dns_dp:使用DNSPod api模式
# 单域名
acme.sh --issue -d example.com --dns dns_dp

# 多域名
acme.sh --issue -d example.com -d www.example.com --dns dns_dp

# 泛域名
acme.sh --issue -d example.com -d *.example.com --dns dns_dp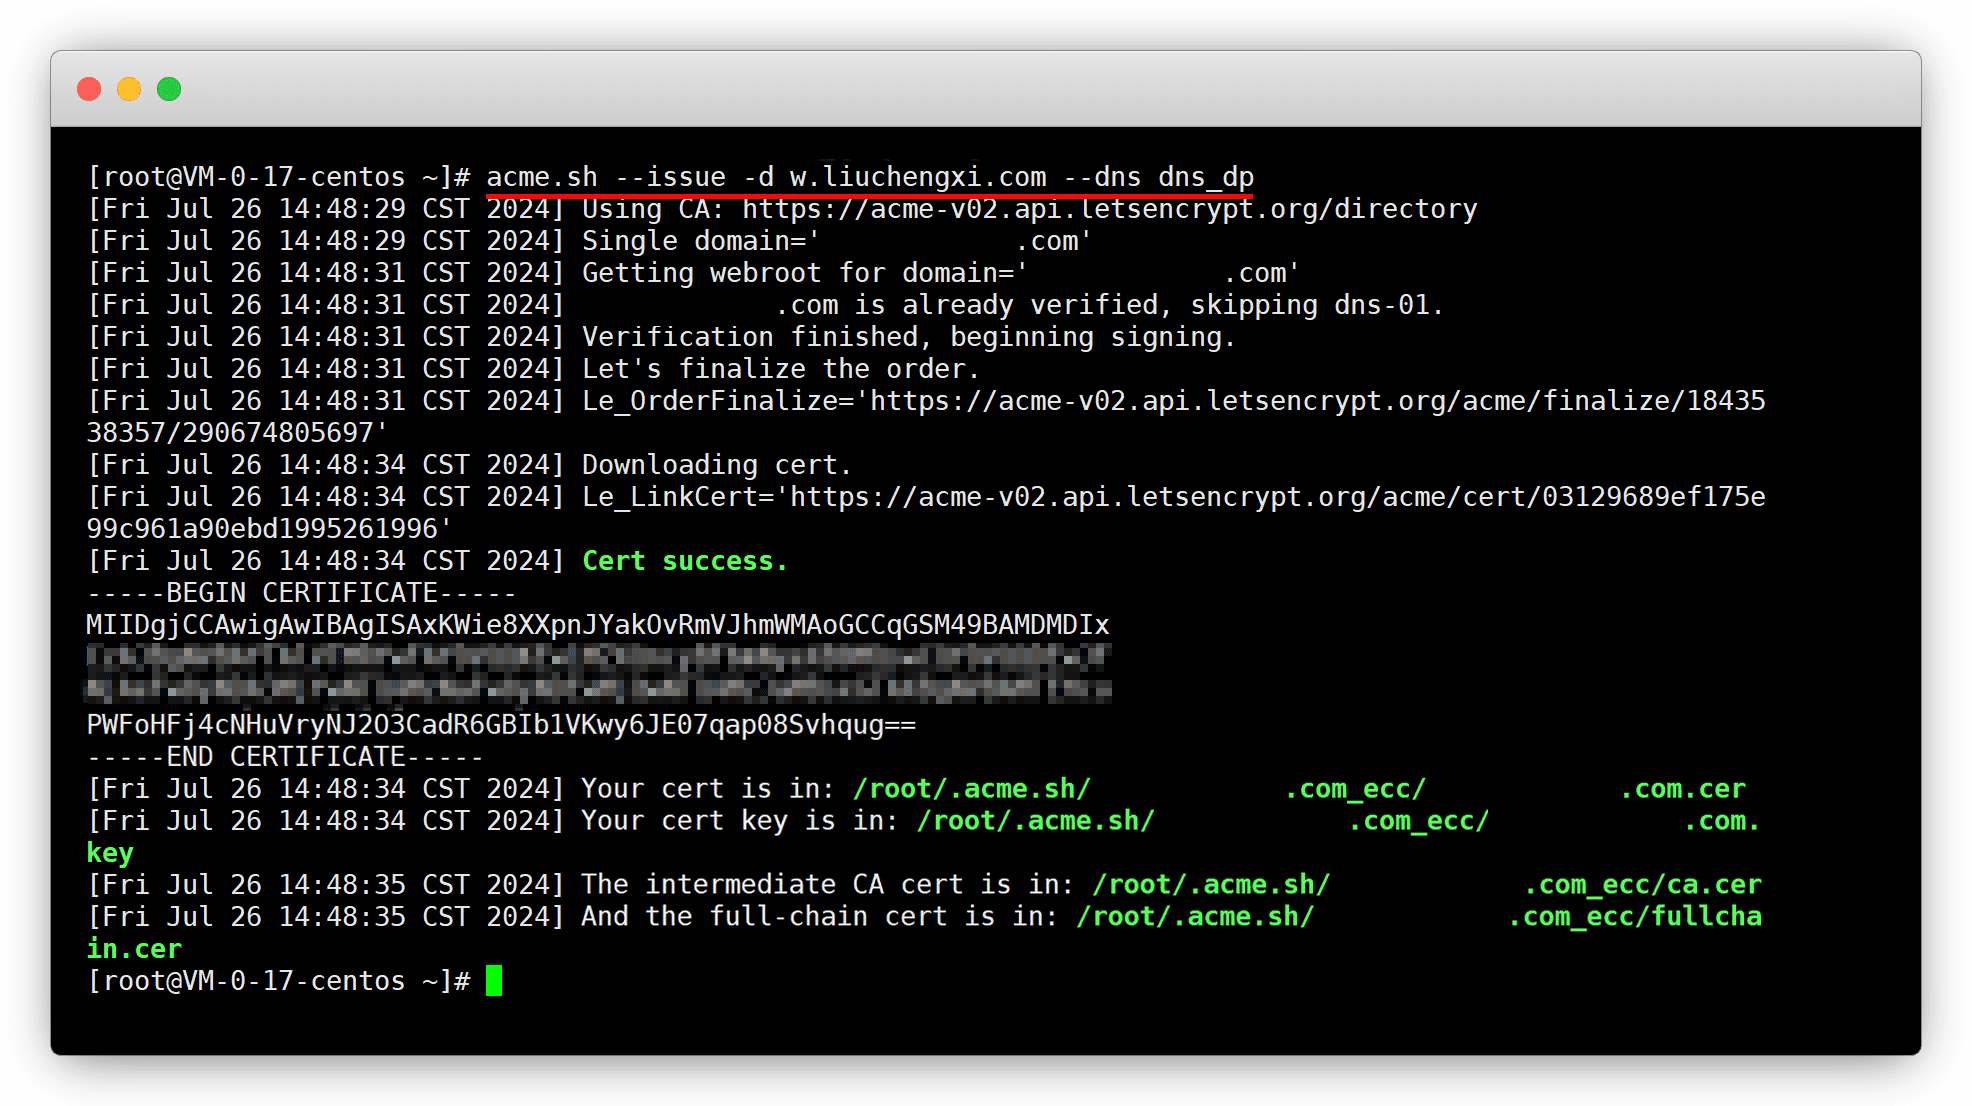
DNS manual
DNS手动模式,如果你的域名商没有api,就用此方式,但是无法自动续签!
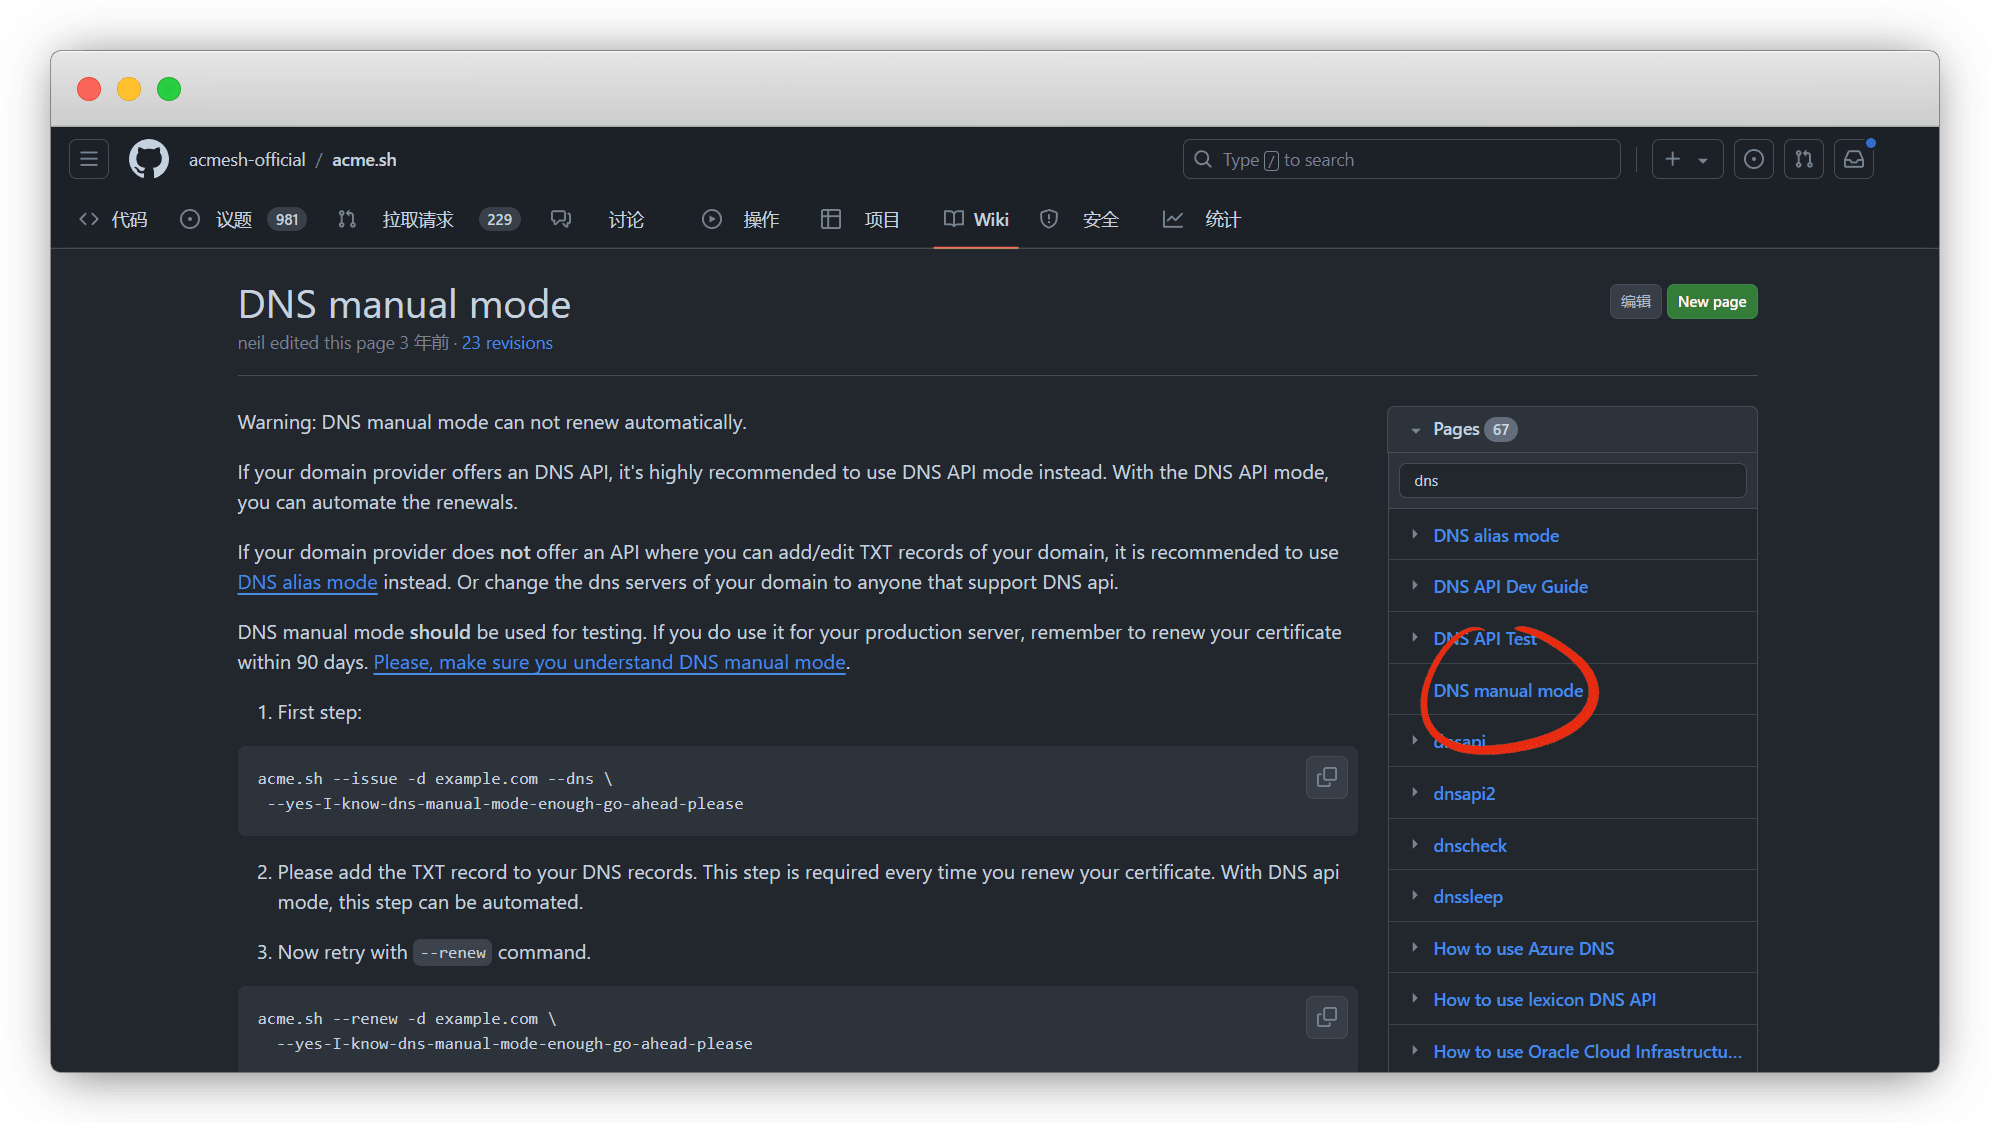
在 wiki,搜索 dns,点击 DNS manual mode
说明
- --issue:颁发证书
- -d:指定需要申请证书的域名
- --dns:使用DNS验证
- yes-I-know-dns-manual-mode-enough-go-ahead-please:确定使用手动模式
# 单域名
acme.sh --issue -d example.com --dns \
  --yes-I-know-dns-manual-mode-enough-go-ahead-please

# 多域名
acme.sh --issue -d example.com -d www.example.com --dns \
  --yes-I-know-dns-manual-mode-enough-go-ahead-please

# 泛域名
acme.sh --issue -d example.com -d *.example.com --dns \
  --yes-I-know-dns-manual-mode-enough-go-ahead-please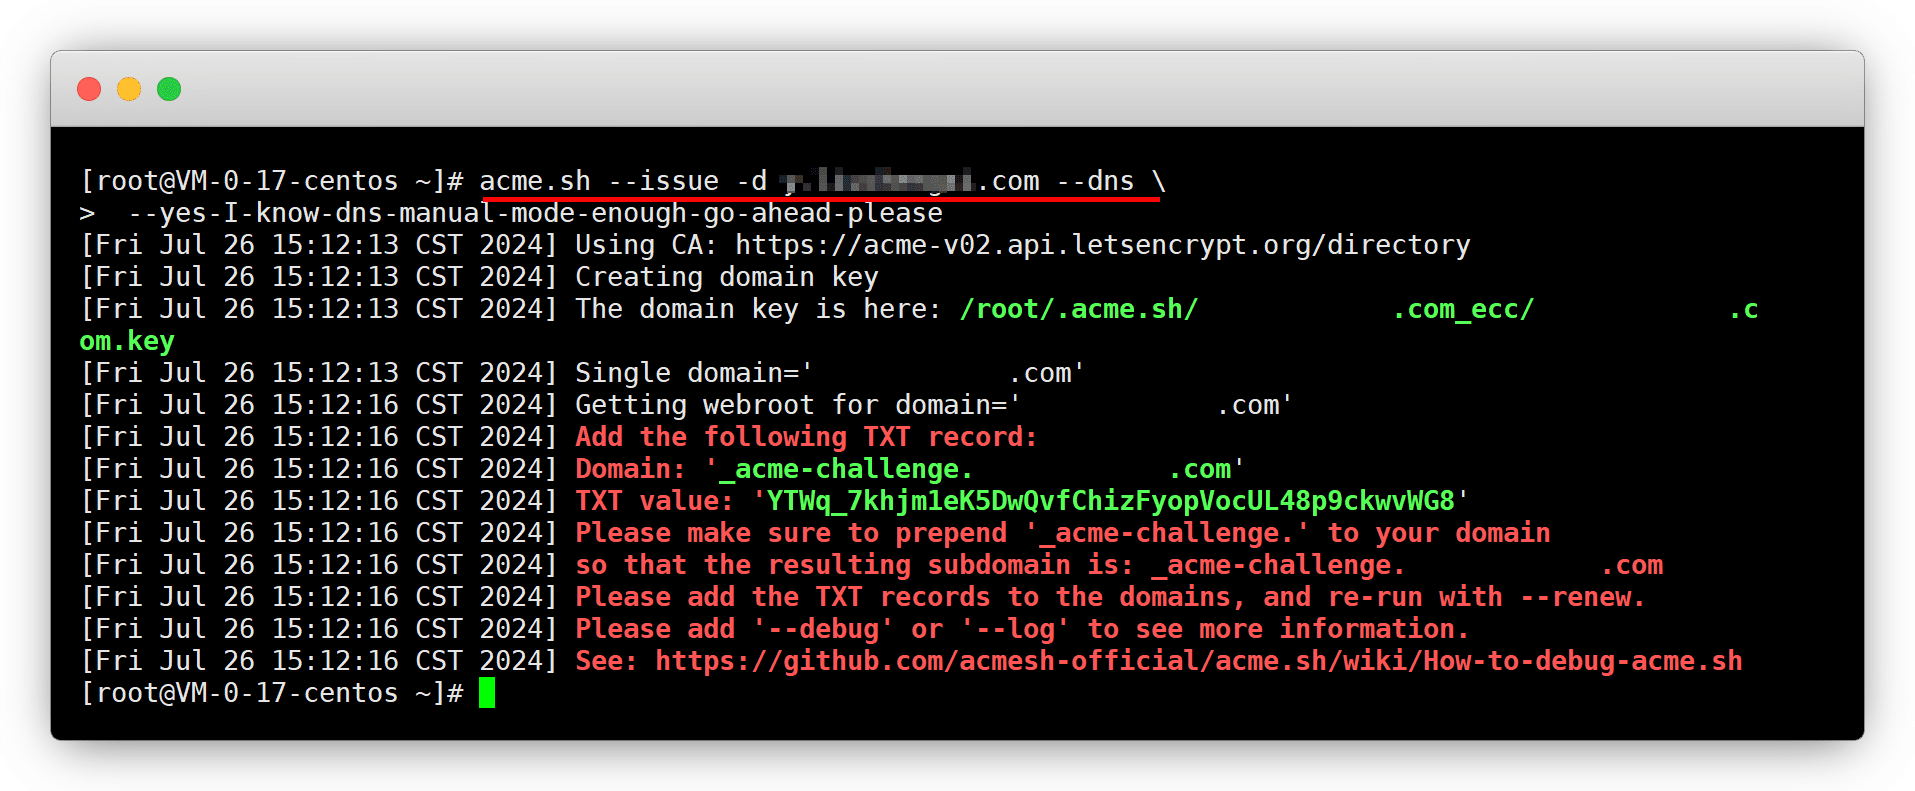
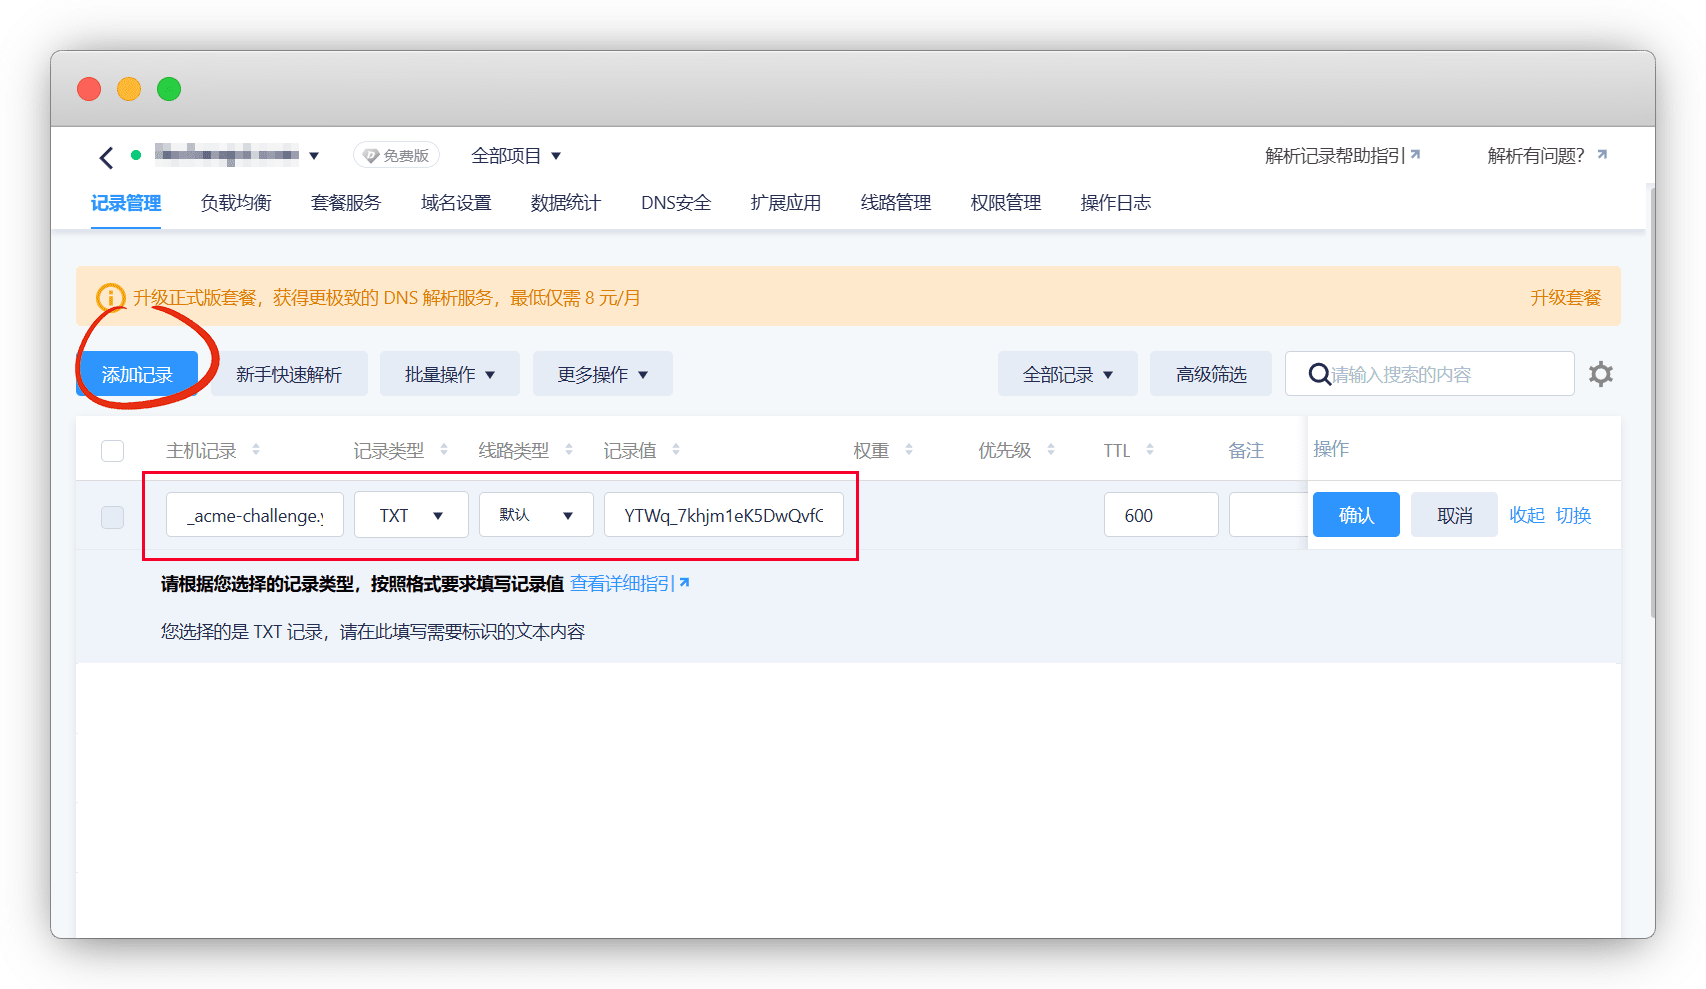
在域名商提供的DNS解析处,添加TXT记录,我用的腾讯云的 DNSPod 演示
验证完成后,记得删除TXT记录,已经没用了
说明
主机记录:填提供的Domain _acme-challenge
记录类型:TXT
记录值:TXT value
特别注意!这里的TXT值,只需要复制域名前部分
一级域名申请:比如解析值是 _acme-challenge.baidu.com,你只需要
_acme-challenge二级域名申请:比如解析值是 _acme-challenge.baike.baidu.com,你只需要
_acme-challenge.baike
然后我们重新申请一次
说明
- renew:更新证书
# 单域名
acme.sh --renew -d example.com \
  --yes-I-know-dns-manual-mode-enough-go-ahead-please

# 多域名
acme.sh --renew -d example.com -d www.example.com \
  --yes-I-know-dns-manual-mode-enough-go-ahead-please

# 泛域名
acme.sh --renew -d example.com -d *.example.com \
  --yes-I-know-dns-manual-mode-enough-go-ahead-please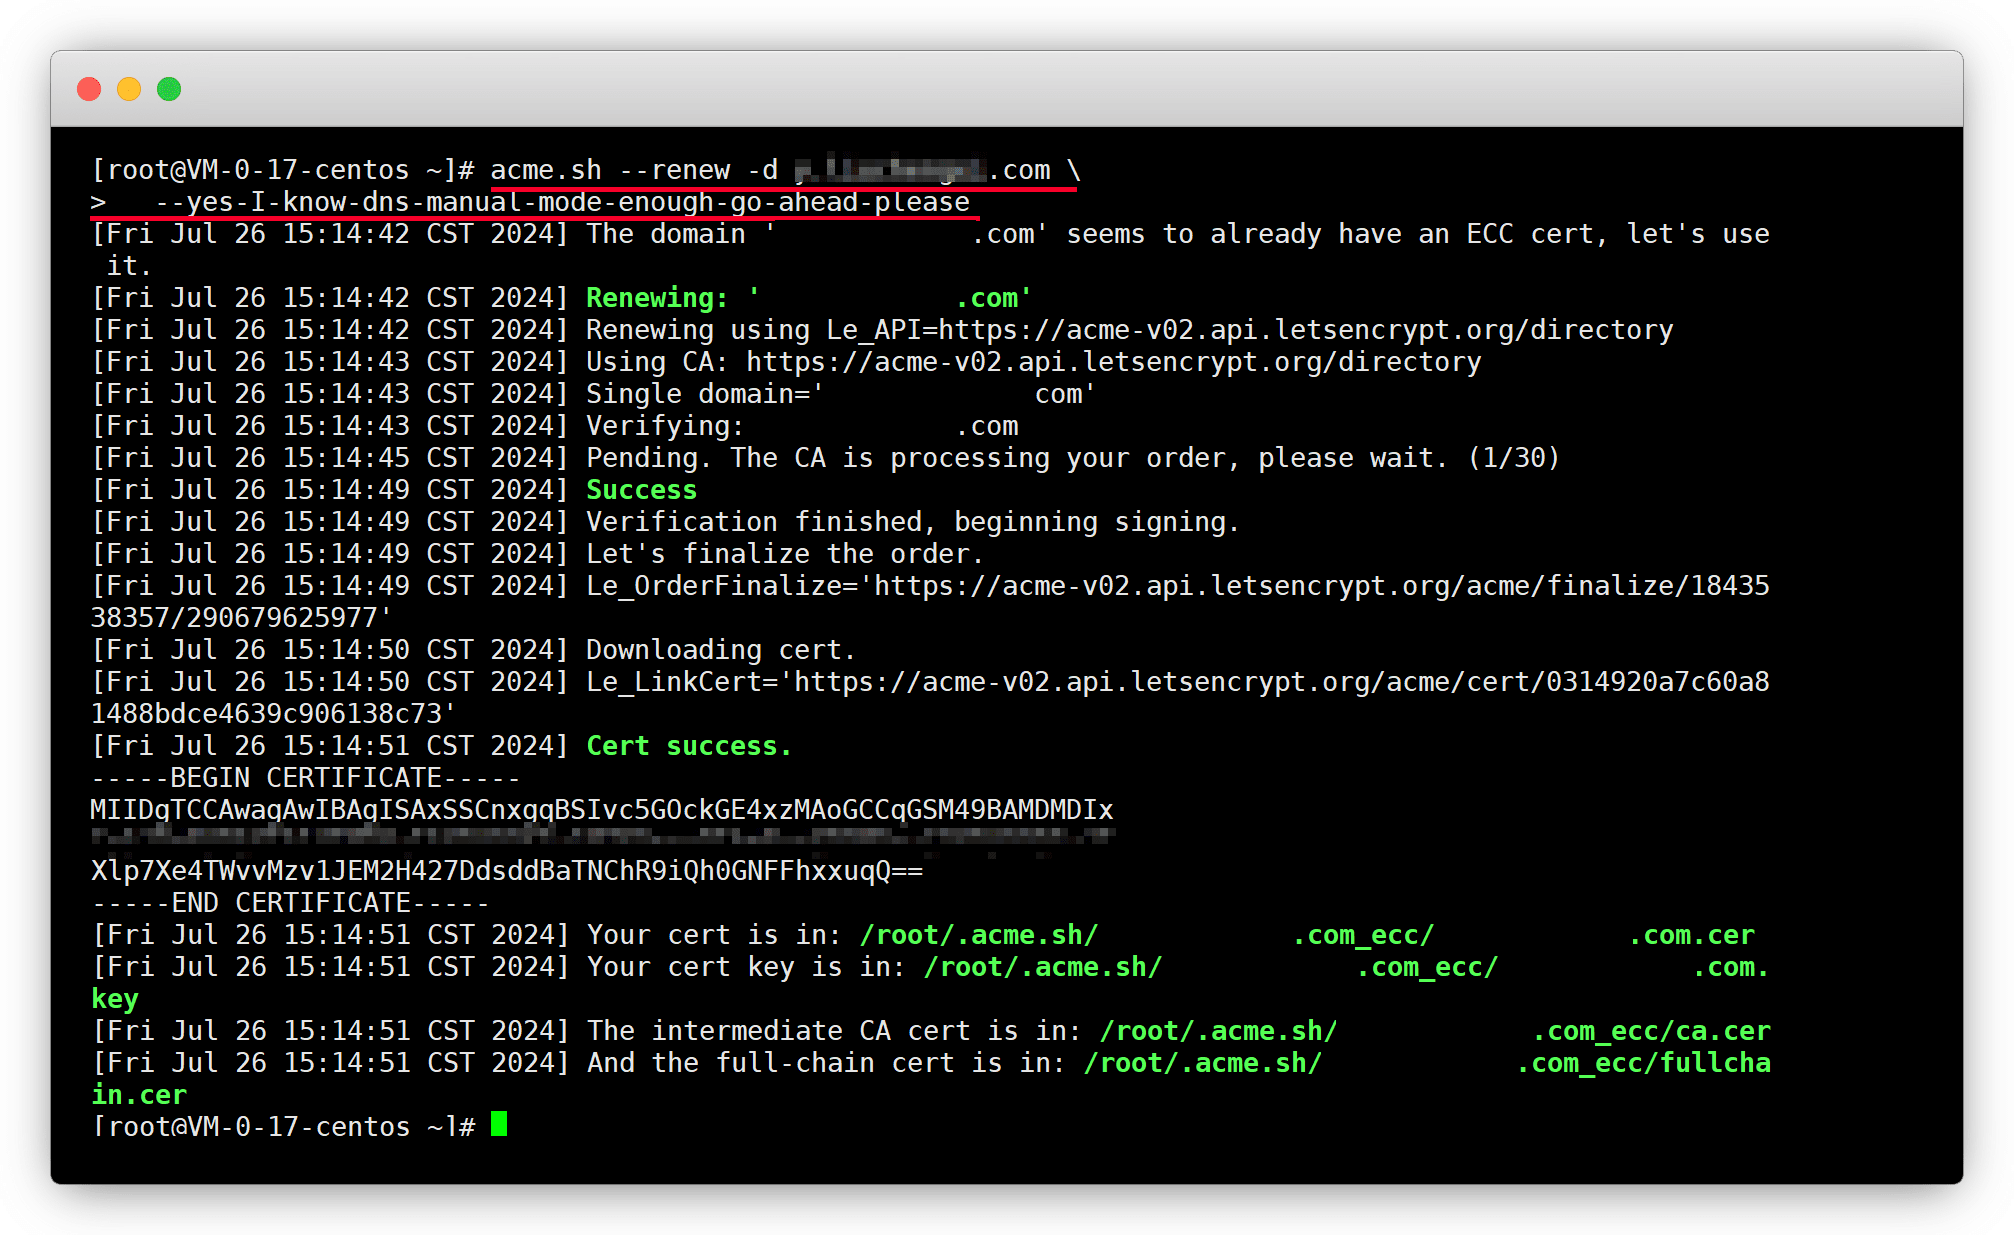
DNS alias
DNS别名模式,如果你的域名商不支持api,又想用api方式,那么别名模式可以实现
在 wiki,搜索 dns,点击 DNS alias mode
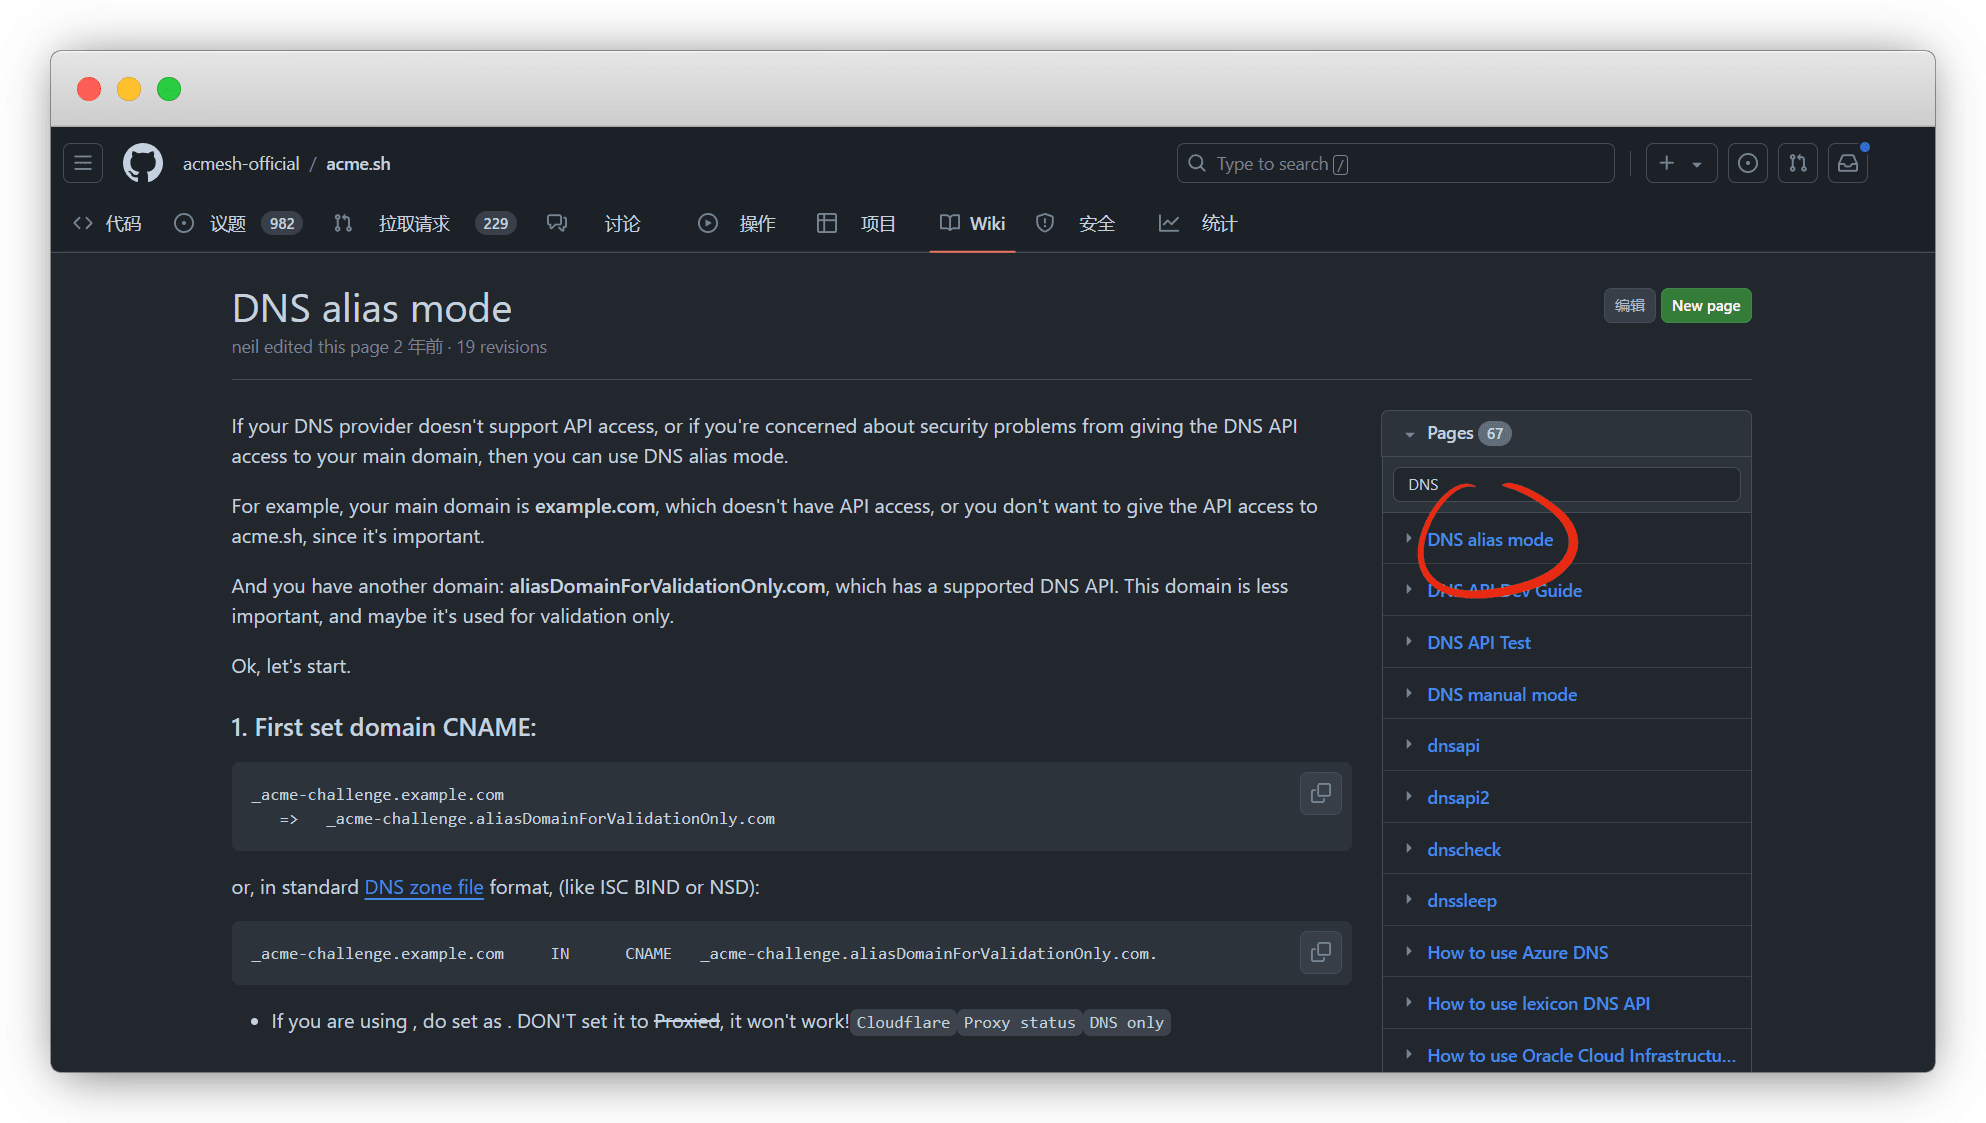
你需要准备两个域名,并设置设置域名CNAME
A域名:
example.com(不支持api)B域名:
aliasDomainForValidationOnly.com(支持api)
# 单域名
_acme-challenge.example.com
   =>   _acme-challenge.aliasDomainForValidationOnly.com

# 或者
# _acme-challenge.example.com	IN	CNAME	_acme-challenge.aliasDomainForValidationOnly.com.


# 多域名
_acme-challenge.example.com
  =>   _acme-challenge.aliasDomainForValidationOnly.com

_acme-challenge.www.example.com
  =>   _acme-challenge.aliasDomainForValidationOnly.com

_acme-challenge.example.org
  =>   _acme-challenge.aliasDomainForValidationOnly.com
然后,你需要按照 DNS API的教程给支持API的域名,正确配置好环境变量,再开始申请
说明
- --issue:颁发证书
- -d:指定需要申请证书的域名
- --challenge-alias:别名域
- --dns:使用DNS验证
- dns_dp:使用DNSPod api模式
# 单域名
acme.sh --issue  \
  -d example.com --challenge-alias aliasDomainForValidationOnly.com --dns dns_dp

# 多域名
acme.sh --issue  \
  -d  example.com --challenge-alias aliasDomainForValidationOnly.com --dns dns_dp \
  -d  www.example.com \
  -d  example.org

# 泛域名,可混合
acme.sh --issue  \
  -d  example.com --challenge-alias aliasDomainForValidationOnly.com --dns dns_dp \
  -d  *.example.com \
  -d  example.org \
  -d  *.example.org
你还可以使用混合模式,不同的别名域,不同的DNS商
# 别名域1
_acme-challenge.example.com
  =>   _acme-challenge.aliasDomainForValidationOnly.com

# 别名域2
_acme-challenge.example.net
=> _acme-challenge.aliasDomainForValidationOnly2.com# --challenge-alias no 不使用别名域
acme.sh --issue \
-d alias.example.com --challenge-alias no
-d example.com --challenge-alias aliasDomainForValidationOnly.com --dns dns_dp \
-d example.net --challenge-alias aliasDomainForValidationOnly2.com --dns dns_cf \Apache
我的服务器没有安装 阿帕奇 ,无法提供演示
而同样的Nginx有占用低、高并发、扩展服务器集群等优势
# 单域名
acme.sh --issue -d example.com --apache

# 多域名
acme.sh --issue -d example.com -d www.example.com --apache
Nginx
如果已经安装了 Nginx,可以直接用 nginx 来颁发,证书颁发后会恢复你的 nginx conf
# 查看nginx版本
nginx -v
确定安装了nginx,我们就直接来申请吧
说明
- --issue:颁发证书
- -d:指定需要申请证书的域名
- --nginx:使用 nginx 服务器来颁发
# 单域名
acme.sh --issue -d example.com --nginx

# 多域名
acme.sh --issue -d example.com -d www.example.com --nginx

# 文件无法找到时,指定文件
acme.sh --issue -d example.com --nginx /etc/nginx/nginx.conf

# 指定网站配置
acme.sh --issue -d example.com --nginx /etc/nginx/conf.d/example.com.conf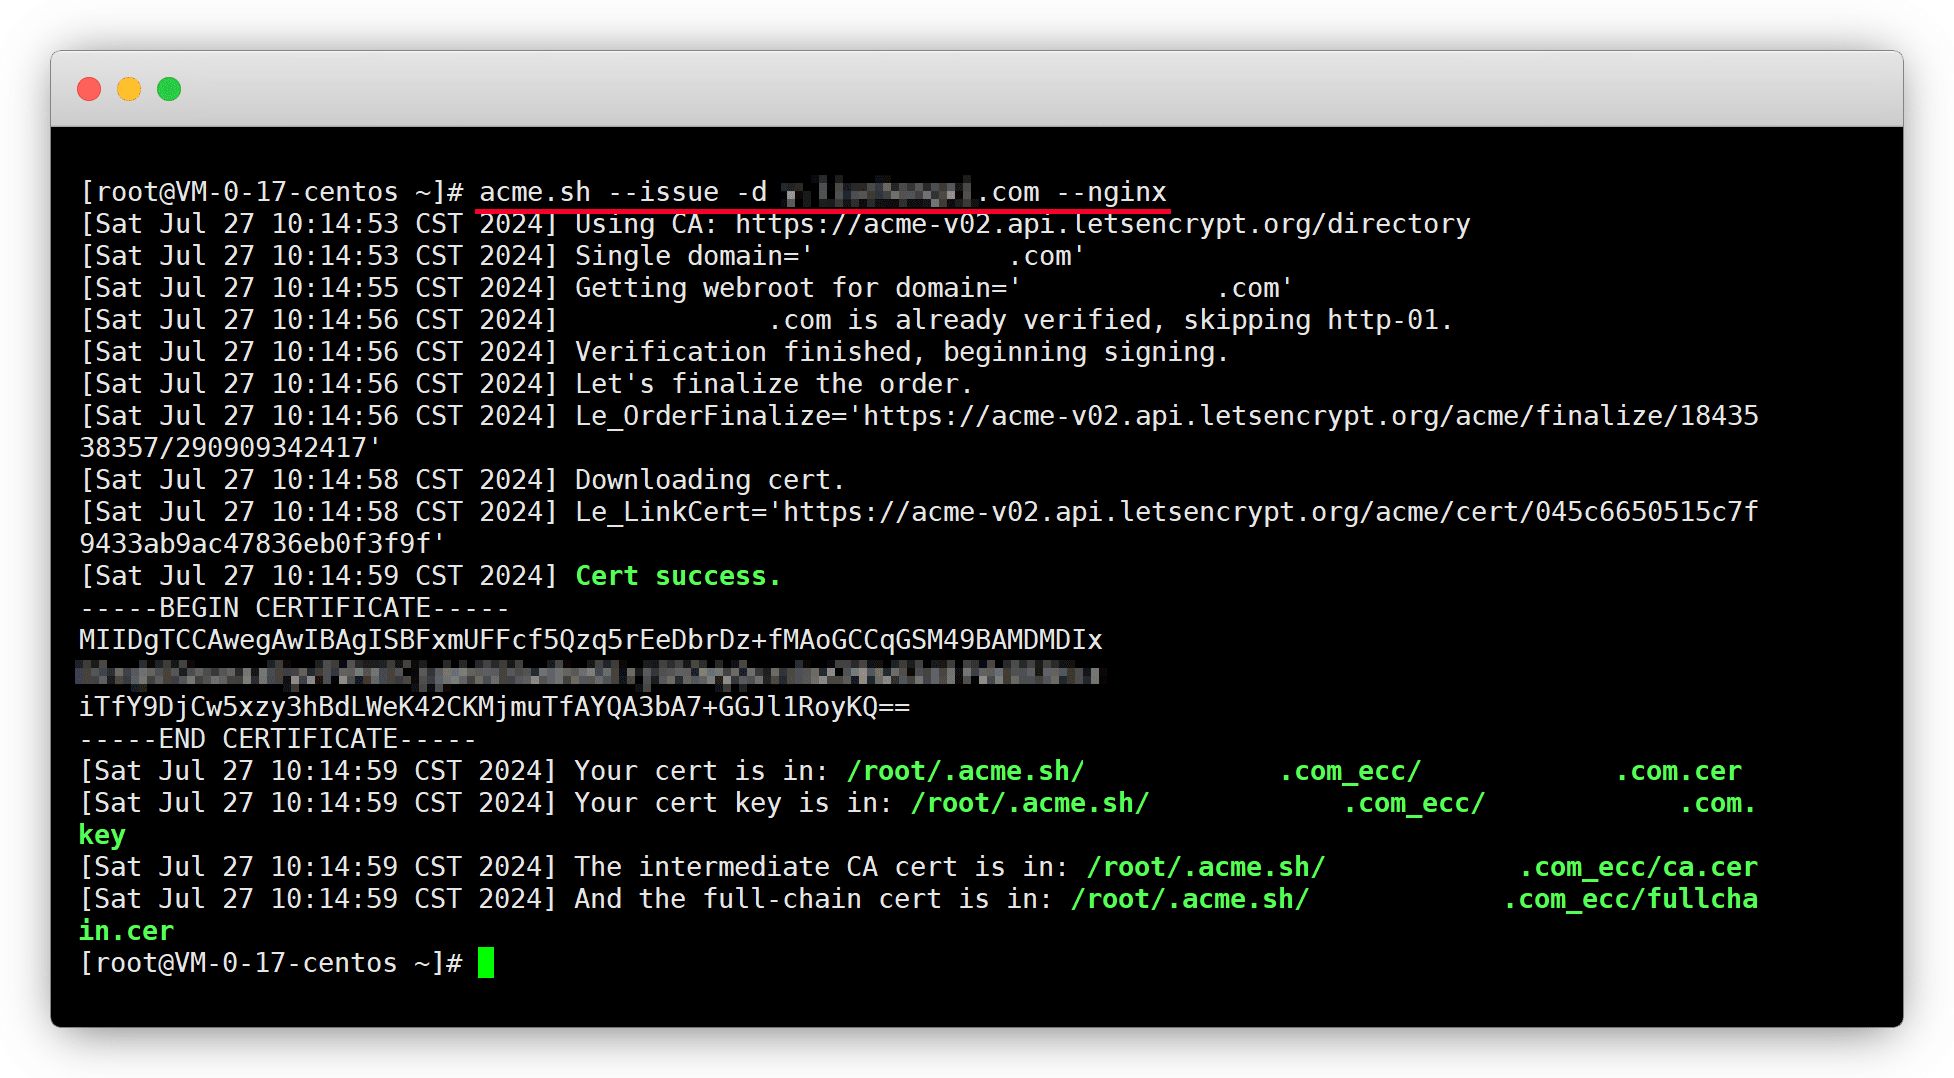
混合模式
请先了解其他模式的使用后,再来尝试
# 混合模式
acme.sh  --issue  \
-d aa.com  -w /home/wwwroot/aa.com \
-d bb.com  --dns dns_cf \
-d cc.com  --apache \
-d dd.com  -w /home/wwwroot/dd.com
查看证书
申请好了,我们用命令查看一下证书
acme.sh --list默认是 ec-256 证书,可以根据自己喜好申请时更改
ECC证书和RSA证书
RSA:非对称加密算法,普及率高,但密钥较长,安全性一般
ECC:椭圆加密算法(Elliptic Curve Cryptography),密钥短,安全性高,建议使用
| RSA密钥长度 | ECC密钥长度 | 使用(在申请证书命令后添加) |
|---|---|---|
| 2048 | - | --keylength 2048 |
| 3072 | 256 | --keylength 3072--keylength ec-256 |
| 4096 | - | --keylength 4096 |
| - | 384 | --keylength ec-384 |
| 8192 | - | --keylength 8192 |
| - | 521 | --keylength ec-521 |

证书所在的目录,我们可以cd进去看一下
# 进acme.sh目录并列出
cd ~/.acme.sh && ls

# 进域名ECC证书文件夹并列出
cd 你的域名.com_ecc && ls

# 回到根目录
cd ~
!说明:其中 *.key 和 fullchain.cer 是安装所需要的文件
.com.key:私钥
.com.cer:域名证书
ca.cer:CA颁发的中间证书
fullchain.cer:证书链(域名证书+中间证书)
.com.csr:证书签名请求
.com.csr.conf:证书签名请求配置文件

安装证书
在wiki中已有详细的 中文教程,如果还是没看懂,等我有空了补吧
使用Nginx演示,先查看nginx所在目录
命令无效?
没有安装nginx,如果你使用了宝塔,无需使用acme.sh
nginx -t
这里的 /path/to/.. 要改成自己证书所在目录
acme.sh --install-cert -d example.com \
--key-file       /path/to/keyfile/in/nginx/key.pem  \
--fullchain-file /path/to/fullchain/nginx/cert.pem \
--reloadcmd     "service nginx force-reload"
最后修改下Ngix.conf文件,指定证书路径即可
常用命令
# 查看帮助
acme.sh -h

# 查看版本
acme.sh -v

# 列出所有证书
acme.sh --list

# 查看配置
acme.sh --info

# 查看域名配置,多域名证书填主域名
acme.sh --info -d xxx.com

# 升级并设置自动升级
acme.sh --upgrade --auto-upgrade

#关闭自动升级
acme.sh --upgrade --auto-upgrade 0

# 定时任务自动续签证书
crontab  -l

# 运行定时器,续期所有证书
acme.sh --cron

# 强制签发证书
acme.sh --issue -d example.com --force

# 指定域密钥长度,默认:ec-256 或 ec-384、ec-521、2048、3072、4096、8192
acme.sh --issue -d example.com --keylength ec-256

# 查看bug日志
acme.sh --issue -d example.com --debug

# 续期指定证书,若没到期也可使用--force强制更新
acme.sh --renew -d xxx.com

# # 续期所有证书,若没到期也可使用--force强制更新
acme.sh --renew-all

# 设置默认CA,目前脚本默认为zerossl
acme.sh --set-default-ca --server letsencrypt

# 移除证书,只是移除自动更新和管理,证书文件不会删除
acme.sh --remove -d example.com

# 卸载 cron计划任务也会被移除
acme.sh --uninstall